Showing posts with label pork. Show all posts

Tuesday, June 18, 2019

Rollin' Rollin' Rollin': Meatloaf with Greens & Cheese


Do you ever get an idea in your head and it just sits there, occasionally tweaking your brain with that "now what was that" niggling feeling? That was the case when I was thawing out some pasture-raised hamburger from Carman Ranch the other night, wondering whether to make burgers—we had leftover homemade buns in the freezer—or a marinara with pasta, or tacos or…meatloaf?

Pat out the meat and top with cheese and greens.

That's when it hit me. That idea I'd toyed with at some point in the misty past to make a meatloaf with the usual sofrito of onions and garlic, binding it with eggs and oats, but then flattening it out, filling it with with greens and rolling it up like a jelly roll.

How would I roll it up? Would it stay together or crumble into a mashy mess? There was only one way to find out.

Pull away the sheet as you roll.

Fortunately, my neighbor Bill had gifted me some radishes from his garden with their gorgeous greens still attached, and we had some leftover grated Parmesan from a risotto I'd made the night before. The rest, as they say, was history.

Rolled Meatloaf with Greens and Cheese

3 Tbsp. olive oil
1 onion, chopped fine
3 cloves garlic, minced
1 1/2 lbs. hamburger
1 1/2 lbs. ground pork
2 eggs
1/2 c. rolled oats
1 Tbsp. dried herbs (I used a combination of basil, oregano and thyme)
2-3 c. greens, sliced into chiffonade (I used radish greens, but kale, spinach, chard or any other greens would do.)
1 c. finely grated Parmesan

Preheat oven to 375°.

Heat olive oil in medium-sized skillet over medium-high heat. When it shimmers, add chopped onion and sauté until tender. Add garlic and sauté briefly until aromatic. Take off heat and allow to cool.

Combine hamburger, pork*, eggs, oats and onion mixture in a large bowl. (I mix it using just my fingers so the meat stays crumbly and doesn't get clumped together.) Form the meat into a loose ball in the bowl.

Lay out a sheet of parchment paper or plastic wrap about 15" long on a cutting board. Put the meat in the center of the sheet and start pressing it out until it's about 3/8" thick. Sprinkle it with the cheese and the greens in an even layer. Take the long edge of the sheet and start rolling it, repairing any cracks with your fingers, peeling away the sheet as you roll. Close up each end by patting the meat over the exposed edges.

When it's rolled up completely, transfer seam-side down to a sheet pan that's lined with parchment. Bake in a 375° oven for 40-50 minutes until instant-read thermometer inserted in thickest part reads between 140-150° (cookbooks all say 160°, but I find that results in drier meatloaf, so you decide for yourself). Remove from oven, tent with foil and allow to rest for 15 min. Slice and serve.

* I like a combination of beef and pork, since it seems to me to make a moister loaf, but all-beef is perfectly fine, too.

Friday, June 14, 2019

Smokin' Dinner: Puerto Rican-Style Smoked Pork Shoulder & Black Beans


When I invited two of my favorite Italian restaurant owners over for dinner, the last thing they were going to hear from me was, "Wait until you try my risotto. I think you'll love it!"

So I went in a completely different direction, to the small island east of Cuba that was hammered so mercilessly by Hurricane Maria a little less than two years ago, an island filled with our fellow American citizens who are still all but ignored in the sturm und drang of our current national crises du jour.

Going into the smoker.

It's hard to find this island's cuisine represented on our local dining scene, and while the flavors of cumin, garlic and chile are found in many Latin cultures, I thought it might be fun to make a dinner based on a Puerto Rican theme. Plus we love their take on pork shoulder, a dish called pernil that, though delicious when roasted in an oven or even on a grill, takes on a whole different character when left for several hours in the smoker.

With Dave primed to spend his day, beer in hand, tending the fire, I needed to come up with a side that would fit in. It just so happened that I had some black turtle beans from Anthony and Carol Boutard of Ayers Creek Farm in the pantry, so I put them on to soak while I did a little research.

Ready to go! (And check out that smoke ring.)

Similar to the black beans I make for taco nights at home, traditional preparations start with a sofrito of onions, garlic, cumin and chile powder, then add in chopped peppers, splashes of wine and vinegar, and chopped olives. These are best simmered for several hours, allowing the beans to get buttery-tender and for flavors to meld into a rich, stewy whole, so I put them on first thing in the morning. Cooking them overnight in a 250° oven would work, too, the only problem being you'd wake up wanting to make huevos rancheros after breathing in the heady aroma of the cooking beans all night.

Dave, of course, did his usual magic with the pernil, allowing the pork to roast low and slow, swathed in the smoke from the mix of charcoal and fresh oak. And the beans got their share of raves, along with sincere thanks from our friends, who, like most chefs I've cooked for, are just grateful to have someone cook for them for once!

Pernil
Adapted from Mark Bittman

1 pork shoulder, 4-10 lbs.
4 or more cloves garlic, peeled
1 large onion, quartered
2 Tbsp. fresh oregano leaves or 1 Tbsp. dried
1 Tbsp. ground cumin
1 tsp. ancho or other mild chili powder
1 Tbsp. salt
2 tsp. freshly ground black pepper
Olive oil as needed
1 Tbsp. wine or cider vinegar
Lime wedges for serving.

Heat oven to 300 degrees or prepare a fire in the smoker, allowing it to reach a stable temperature of 250-275°.

Score meat with a sharp knife, making a cross-hatch pattern. Pulse garlic, onion, oregano, cumin, chili, salt and pepper together in a food processor, adding oil in a drizzle and scraping down sides as necessary, until mixture is pasty. Blend in the vinegar.

Rub this mixture into pork, getting it into every nook and cranny. Put pork in a roasting pan and film bottom with water or, if smoking in the smoker, place it on a rack above a pan of water. Roast pork for several hours until an instant-read thermometer reads 180°. [Our 10-lb. shoulder took 6 hrs. - KB]. Add more water to the pan as necessary, until meat is very tender.

Let meat rest for 10 to 15 minutes before cutting it up; meat should be so tender that cutting it into uniform slices is almost impossible; rather, whack it up into chunks. Serve with lime.

* * *

Puerto Rican-Style Black Beans

1  lb. dried black beans, rinsed thoroughly
3  Tbsp. extra virgin olive oil
1  large yellow onion, chopped
2 poblano peppers, chopped in 1/2" pieces
4 to 5  garlic cloves, crushed
2 tsp. ground cumin
2 tsp. oregano
4 c. water
3  bay leaves
1 Tbsp. salt, plus more to taste
2  Tbsp. red wine vinegar
1/2  c. dry white wine
1/2  c. green olives stuffed with pimentos, thinly sliced

The day before cooking, soak beans overnight in large pot with water covering them by at least 3". The next day drain them and rinse. Set aside.

Heat oil over medium-high heat in large Dutch oven. Sauté onions until translucent, stirring frequently. Add chopped peppers and garlic and sauté until tender. Add cumin and oregano and sauté 30 seconds. Pour in water and add drained beans, olives, bay leaves, vinegar, and white wine. Bring to a boil, reduce heat to simmer and cook, covered, for at least 2 hours. Check occasionally to make sure the beans aren't dry. If they are, add more water.

When beans are tender, if beans are too soupy remove lid and keep simmering until liquid is reduced. Remove bay leaves, turn heat down to warm until ready to serve.

Thursday, November 15, 2018

Winter Warmth: Fennel-Braised Pork Belly Stew


My husband makes bacon. So we go through a fair amount of pork belly in year's time, even when we're doing 12 to 14 pounds at a time. (Our friends are often happy recipients, and between trips to the beach and summer camping with big groups, we can go through a lot.) The thing is, he likes to square off the sometimes-raggedy ends of the bellies before curing them, which means there are several odd chunks of belly that pile up in the freezer.

Browning the belly.

Rummaging through the freezer the other day, I realized we had accumulated close to three pounds of these frozen ends, including recent trimmings from some gorgeous Joyce Farms pork belly, whose regenerative agricultural practices are beyond impressive. So I began scouring through online recipes that didn't require hours of prep time or, heaven forfend, a trip to the store.

Luckily I'd picked up a couple of bulbs of fennel at the farmers' market, and when I saw a fennel-braised belly from Mario Batali on the list, I gave it a look. In typical Batali fashion (don't get me started) it was packed with loads of over-the-top spicing—three tablespoons of chopped rosemary plus three tablespoons of ground fennel seeds in the rub, then another tablespoon of ground fennel seeds in the braise. Really, Mario?

Greatly reducing the amount of ground fennel and cutting the rosemary by a third balanced out the flavors and avoided what could have been a bitter aftertaste in the braise. Oh, and the finished bacon? Spectacular, as always.

Fennel-braised Pork Belly Stew

For the rub:
1/2 c. brown sugar
1 Tbsp. fennel seeds, toasted and ground
3 Tbsp. salt
2 Tbsp. fresh rosemary, finely chopped
2 tsp. red pepper flakes

For the braise:
2 Tbsp. olive oil
3 lbs. pork belly (skinless)
2 bulbs fennel
2 carrots, quartered and sliced crosswise into 1/2” pieces
1 onion, chopped in 1/2” dice
4 cloves garlic, roughly chopped
1 12-oz. bottle beer (amber or not-too-hoppy winter ale is great)
Salt to taste

To make the rub, toast fennel seeds in a small pan over medium-high heat, moving the pan back and forth to keep them moving, until they just start to color and smell wonderful. (You want to avoid any smoke, which indicates burning.) Remove from heat, cool slightly and grind in spice grinder. (We have an inexpensive electric coffee grinder dedicated to grinding spices.) In a small bowl, combine with remaining rub ingredients and stir.

Cut 1/2” deep, diagonal grid into both sides of the pork belly. Cover both sides with spice rub.

Heat olive oil over medium-high heat in large Dutch oven until it shimmers. Add pork belly and sear on both sides. Remove to plate when well-browned. Add onions to pot and sauté until translucent, scraping up browned bits from searing the belly. Add garlic until it is warmed and fragrant. Add remaining vegetables and seared pork belly. Pour beer over the top, bring to a boil and reduce heat to simmer. Cover and cook for 1 1/2 to 2 hrs. Adjust salt to taste as necessary.

If you like, you can chop the nearly-falling-apart belly into biggish chunks before serving. I served it with roasted slices of garnet yam, but next time I'm going to give Hank Shaw’s squash dumplings (without the mushrooms) a try; you could make them while the stew cooks.

Thursday, September 06, 2018

The Braise is Back: Beer-Braised Poblano Pork


Now, I'm not one to trumpet the end of summer and the beginning of that four-letter word beginning with "f" (and ending with "double toothpicks" for those of you old enough to remember that old saw). But I do appreciate the moderating temperatures during the day and the rapid cooling at night, making pulling up the covers a welcome necessity.

Yes, I'm a native Oregonian. Is it that obvious?

A drizzle of cilantro chimichurri? Sure!

While there's still plenty of grilling weather in the forecast, with salmon and albacore running strong, and tomatoes, peppers and a bounty of other delicious things coming in from local farms (whew!), it's also possible to turn on the stove without the fear of making your home feel like you're living in some hot, humid East Coast city. (No wonder those politicians in DC are so grumpy all the time, huh?)

The other day I'd picked up a pork shoulder at the store, pondering what to do with it when I got home—Chili? Posole? Pulled pork?—and then, while rummaging in the vegetable bin, found several large poblano peppers that had jumped into my farmers' market basket the weekend before. Excellent!

A little chopping, a little sautéing, a can of Hopworks pils from the fridge, and in under half an hour I had a pot of pork bubbling away on the stove. Then two hours later we were sitting down for what I have to say was a spectacular dinner. By the way, the chimichurri came about when during the aforementioned rummaging I ran across a bunch of cilantro that was soon to expire, so whizzed that up in the processor with some lime and garlic and, voilà, instant zhoosh!

Beer-Braised Poblano Pork

4 lbs. pork shoulder, cut in 1” pieces
3 Tbsp. vegetable oil
1 large yellow onion, in 1/2” dice
4 cloves garlic, roughly chopped
3 large poblano peppers, seeded and chopped in 1” pieces
2 serrano peppers, seeded and minced
12 oz. light beer (a Northwest pilsner works nicely)
2 c. chicken stock
2 tsp. dried oregano
2 bay leaves
2 tsp. salt plus more to taste

Heat oil in Dutch oven over medium heat until it shimmers. Add onion and sauté until translucent, then add garlic and peppers and sauté until tender. Add pork, beer, stock oregano, bay leaves and salt. Bring to a boil, then reduce heat to simmer and cover. When pork is tender (almost falling apart), taste for salt and serve in bowls with rice or grain and a drizzle of chimichurri (recipe below).

* * *

Cilantro Chimichurri

2 c. cilantro
1/3 c. olive oil
2 large cloves garlic
2 tsp. oregano
1 tsp. red pepper flakes
2 Tbsp. lime juice
Salt to taste

Place all ingredients in food processor or blender and process until smooth.

Saturday, January 20, 2018

Craving Carnitas


I'd been jonesing for tacos for days, and just hadn't got around to making them. Then, fortuitously, some friends said they were going to be in the 'hood one evening, which gave me the perfect excuse to try a new method for making carnitas. (And yes, I'm one of those people who tries out new recipes on guests, much to the chagrin of my mother who considered it much too risky.)

I'd already pulled a four-pound pork shoulder out of the freezer, it being a weekend and the perfect time for a nice slow braise on the stove. So I picked up some cotija cheese made by Albany's Ochoa's Queseria, cabbage for slaw, plus an avocado, salsa and tortillas. (I'm a huge fan of the organic tortillas from Three Sisters Nixtamal. It's a local company that makes masa using a traditional process called nixtamalization, where dried corn kernels are soaked in slaked lime, then ground and made into dough.)

Carnitas, which means "little meats," is made by simmering chunks of pork with citrus and spices for several hours until it's tender and on the verge of falling apart. I had some whey left over from making ricotta, so I decided to use it for the braising liquid, since the acids in the whey would help to break down and tenderize the meat. The method I used then calls for shredding the meat, roasting it in the oven (or in a cast iron pan on the grill) until any remaining liquid evaporates and the meat is crispy.

Warming the tortillas on a griddle is quick and easy, though I'm always tempted to pile them with heaps of fixin's, but exercising a teensy bit of restraint is worth the reward of the perfect bite, instead of bursting the taco or losing too much on your plate. Plus it means I can enjoy a few more of those longed-for tacos!

Carnitas

4 lbs. boneless pork shoulder
1 qt. whey, water or stock
1 onion, sliced in half lengthwise, then crosswise into 1/8” slices
8 cloves garlic
2 tsp. oregano
4 bay leaves
2 tsp. ground cumin
1 orange, quartered
1 Tbsp. kosher salt

Put all ingredients into large Dutch oven and bring to a boil. Reduce heat to simmer for 2-3 hours until meat is starting to fall apart and liquid is almost gone. If there is quite a bit of liquid left, remove the meat to a roasting pan, disposing of the orange peel and bay leaves. Bring the liquid in the pot to a boil and reduce until there is less than 1 cup remaining.

While liquid reduces, heat oven to 450°. When liquid has reduced, pour over meat in roasting pan and place in oven for 20-30 minutes or until it starts to brown. Shred any remaining large pieces.

Thursday, December 29, 2016

A Christmas Story in Fourteen Pounds


I knew we were in trouble when I mentioned to Ben Meyer that we were planning to smoke a bone-in ham leg for Christmas dinner in a week's time. The owner of Old Salt Marketplace got a concerned look on his face and said, "So how long have you had it brining?"

"Um…you mean I should have taken it out of the freezer already?" I responded.

The meat injector. Scary, huh?

He went on to say—to his great credit there was no eye-rolling, at least that I noticed—that in order to have it ready by Christmas we would need to inject it with brine. There was no way that the brine for a ham that large, about 14 pounds or so, would have time to penetrate all the way through the meat. (I found out later that it can take as long as a month for that to happen. Heh.)


A classic on all fronts.

Fortunately he happened to have a spare injector that he could loan us, and brought out a tool that looked as if it was used in medieval dentistry or some other torture. The main chamber is pumped full of brine, then the needle—in this case, one with holes on the sides instead of the end—is inserted perpendicular to the bone, spraying the brine into the meat. For the brine itself, he suggested using Paul Bertolli's recipe from Cooking By Hand, a groundbreaking collection of recipes for making everything from bread to charcuterie.

Brining the ham.

I came home and ran to take the ham out of the freezer, leaving it on the counter to thaw. Two days later Dave made the brine, a beautiful and fragrant blend of vegetables, herbs, salts and water, and injected it every inch-and-a-half or so all the way around the leg. Then into the fridge it went, submerged in the brine to soak for six days.

Going in the smoker.

Dave pulled it out on Sunday morning, noting the hammy, dark pink tinge the meat had taken on from the curing process. He rinsed off the ham, then started the smoker with charcoal briquets, as well as soaking chunks of apple wood to add their unique notes to the smoked meat. He'd read various accounts of how long it might take to smoke a leg of pork that large, which ranged from six to 12 hours to reach his target of 140 degrees. He planned to keep his smoker in the 200 to 250-degree range, hoping for an overall time of eight hours.

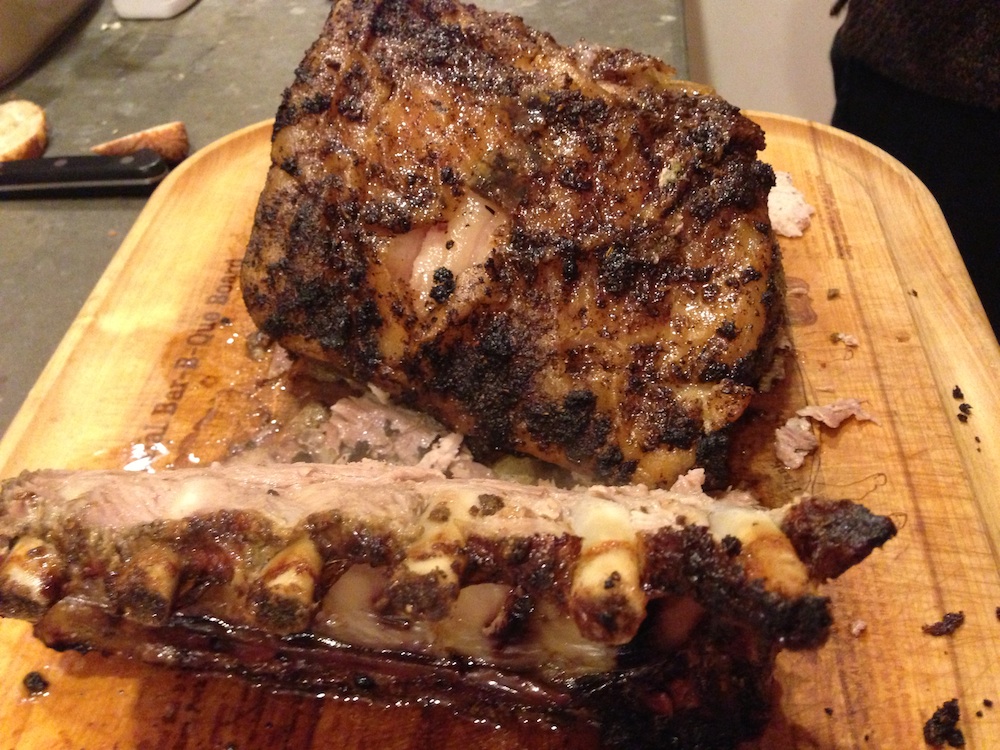
When the smoker was ready, he put on what we hoped was going to be a perfect ham. After diligently tending the fire, six hours and two or three beers later it reached the desired temperature. Since the ham needed to rest anyway, we just wrapped it in foil, planning to serving it at room temperature. But first, of course, a few samples were sliced off to make sure it was company-worthy.
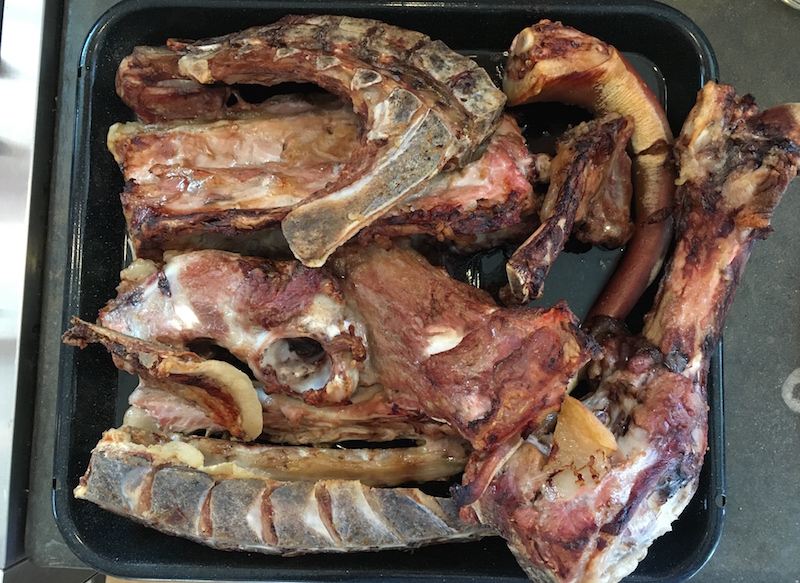
Six hours later…

I have to mention here that, lest you think that this project was a no-muss, no-fuss affair that we just dashed off casually, the night before I'd laid awake worrying about how salty the ham might be, running through the coulda-woulda-shoulda factors of whether we should have soaked it in water the night before to desalinate the ham and what to do if we had 14 pounds of puckeringly salty meat to somehow find a use for. And what would we be having for Christmas dinner? The Chinese restaurant scene from the movie A Christmas Story briefly flashed through my mind.

Fortunately I didn't turn over and shake Dave awake to relate my awful fears, I just turned over and forced myself to go back to sleep, probably one of the reasons we've managed to stay married for this long.

Oh, and those first slices? Heavenly, probably some of the best ham I've had in my entire life. Which was confirmed by our happy guests, who demolished a good third of the monster along with the creamy scalloped potatoes infused with bacon, caramelized onions and mushrooms, as well as the roasted vegetables and the apple pie for dessert.

A Christmas story with a happy ending? I'd say so. And the epilogue is that, after dinner, Dave was already saying he wanted to do it again. Soon.

Christmas Ham

Brine and preparation of leg from Cooking By Hand by Paul Bertolli, republished with his permission.

For the brine:
3 gallons water
454 grams salt
300 grams sugar
10 grams allspice berries
20 grams black peppercorns
5 grams whole cloves
10 grams whole juniper berries
2 onions (1 lb.), sliced thin
2 carrots, peeled and sliced thin
2 celery stalks, sliced thin
Small bunch of flat-leaf (Italian) parsley
Small bunch of fresh thyme
8 bay leaves
57 grams Instacure No. 1 [pink curing salt]

For the ham:
1 fresh leg of pork, 13-15 lbs. (can also be thawed from a frozen leg)

To prepare the brine solution, put the water in a large pot. Add the salt and sugar. Crack the whole spices coarsely in a mortar and add them to the brine along with the sliced vegetables and herbs. Warm the brine to 160° (F) to release the spice and vegetable aromas and to dissolve the salt and sugar. Chill the brine to 34°, stir in the curing salt, and dissolve it thoroughly.

While the brine cooks, prepare the pork leg. Cut away the tailbone [if it hasn't been removed already] and trim away any skin, fat and glands that may remain on the flank side. Remove any excess fat around the skinless area of the aitch-bone.

Place the ham inside a deep pan with the shank end facing you. First, inject brine directly through the base three or four times, adjusting the position of the needle so that the entire shank section receives the brine. Next, turn the leg aitch-bone up so that the shank end is facing away from you. Beginning at one edge, plunge the needle deep into the heavy muscle of the lower leg, directing the needle toward the bone. Continue injecting brine at 1 1/2-inch intervals across the leg. You will notice the various muscles of the leg swelling as  you pump the brine [some will leak out, which is fine]. Once you have reached the edge of the leg, return to the starting point and make a second row of injections 1 1/2 inches behind the first. Continue altering the angle of the needle around the bone until you have injected the entire leg. In all it should take 15 to 16 injections.

Place the leg into a bucket—we used a 12-quart Cambro container that fits in our fridge—and pour in the brine until the leg is submerged. Place the lid on the container and refrigerate for at least six days. After six days, remove the ham from the brine and rinse off. Discard the remaining brine.

Prepare the fire in the smoker, adding whatever well-soaked wood chunks you prefer. Put the ham in the smoker and maintain the internal temperature of the smoker between 200 and 250 degrees, adding more briquets as needed. When the internal temperature of the ham reaches 140°, remove from the smoker and rest for at least 30 minutes before serving.

Monday, August 08, 2016

White Barbecue Sauce: What Alabama Knows


Contributor Jim Dixon of Real Good Food knows his fire, and if he says white barbecue sauce is the real deal, then I'm all in. But he begins this essay with a caveat for all the barbecue essentialists out there.

[Note] Barbecue semantics: Anytime the word barbecue is used somebody will point out that the usage is wrong. Point taken.
Alabama White Barbecue Sauce

Big Bob Gibson created this mayo-based sauce for the chickens he cooked at his namesake Bar-B-Que restaurant in Decatur, Alabama, in 1925. You can buy it bottled right from the source, but it's easy to make. Since tomato-based sauces almost always have some sugar in them, they tend to burn if brushed on during cooking, but Alabama white bbq sauce doesn't. It adds a nicely caramelized coating to whatever you've got on the fire.

I don't actually measure anything when I mix up a batch, so these are approximate quantities. Start with about a cup or mayonnaise (I like Duke's), then add about a quarter cup of Katz Gravenstein apple cider vinegar, a tablespoon of good prepared horseradish (or grate some fresh), the same amount of mustard (Dijon or stoneground), a couple of chopped garlic cloves, several grinds of black pepper and a shot of Crystal hot sauce.

Brush the sauce on meat while it's cooking, use it as a table sauce for the finished product or try it as a dressing for a salad of raw sweet corn cut from the cob tossed with a chopped Walla Walla sweet onion. I like it on grilled pork shoulder steaks (top photo). Cut about a half-inch thick, these have better flavor than any pork chop. If you can't find them or get your butcher to cut some for you, buy some country style boneless "ribs" (not really ribs but chunks of shoulder). They're typically about an inch thick, so cut them in half, pound to flatten and thin a bit more, sprinkle with sea salt, and let sit for at least 15 minutes. Grill over a moderate fire, basting with the white sauce and turning frequently, for about 20 minutes; move to a cooler part of the grill for the last 10 minutes.

Monday, March 07, 2016

Take that Pork and Smother It (in Gravy)!


There are very few people who love the Cajun food of New Orleans more than contributor Jim Dixon of Real Good Food. Fortunately for those of us who are not as well-versed in the region's cuisine, he's always happy to share his recipes!

Smothered Pork

The last time I wrote about smothered food someone asked if I couldn't use a nicer word. The French and a lot of people in Louisiana use étouffée, but mostly when talking about seafood. The Venetians smother cabbage with onions and wine and call it sofegao in the dialect of the lagoon. But I'm sticking with smothered when it comes to pork (or cabbage, okra, steak, liver, and the other foods smothered in Acadiana).

What does the actual smothering can vary, though. Okra gets smothered by the typical trinity of onion, celery, and pepper with the addition of tomatoes (but not always). Sometimes it's just a lot of cooked down onions, like with smothered cabbage.

This smothered pork comes from Donald Link's first cookbook, Real Cajun. Cochon, one of his restaurants in New Orleans, introduced me to the country food of southern Louisiana (and has been a Real Good Food customer for more than five years). Link's homage to his grandmother's cooking slowly roasts a big pork shoulder in a roux-based gravy flavored with onions and garlic, and it's delicious. But the same smothering technique works well with other cuts of pork, too.

The photo above shows country style "ribs," actually chunks of pork shoulder, and I've smothered chops, too (I find the cheaper pork chops, sometimes sold as sirloin chops, taste better than loin chops). They all start with a good dusting of salt, and if you can let the meat sit for awhile after salting do so.

Use a heavy skillet or Dutch oven (preferably cast iron) and brown the pork on all sides in a splash of olive oil. Remove the meat and add a chopped onion or two (use a couple if you're cooking a big roast, just one for a skillet of chops or shoulder chunks). Toss in some chopped garlic, a couple of sprigs' worth of fresh rosemary and the same amount of fresh thyme, a healthy grinding of black pepper, and cook until the onions have softened, maybe five minutes.

Add about as much flour as there is fat (the olive oil and pork fat from the meat; add more oil if it's less than a couple of tablespoons), and cook it for a few minutes. Add a couple of cups of water or stock, stir well, and put the pork back in the pot. Spoon some of the sauce over the meat, cover, and cook it in a 275° oven until the pork starts to come apart when poked gently (two to three hours for a big roast, less for chops or country ribs).

When the pork is done you can take it out and reduce the gravy a bit if you like, but I find it's usually just right. Serve this with some Kokuho Rose brown rice, and you'll have my friend Pableaux's definition of Cajun food: anything with gravy.

Wednesday, February 24, 2016

Pig Errands: Pick Up, Butcher, Make Stock


Not many husbands get to say, as mine did recently, that their wives are running "pig errands." In that case, I was heading to Mt. Angel in Dave's pickup to fetch the half pig I'd ordered from Kendra Kimbirauskas (above, with her pigs) and her husband, Ivan Maluski, of Shimanek Bridge Farm in Scio.

Bungied and secure for the trip to Portland.

Waiting for me at Mt. Angel Meat Company was owner Eric Fietz, and while he finished a call I got to play with a feral kitten who'd discovered that a meat processing plant was a fine place to hang out. (Eric said he'd been working on taming the black-and-white cutie so he could find it a home, so let him know…) One of his butchers, a big burly guy, came walking out cradling my 125-lb. half as if it was a tiny baby and kindly loaded it in the back of the truck.

It's our fourth half pig in as many years, and I've slowly been learning the basics of butchery with help from Melinda Casady at Portland's Culinary Workshop. She was tied up with classes, though, so I called Ben Meyer of Old Salt Marketplace, hoping he could spare some time to help out, and he graciously agreed, even offering to hang the carcass in his walk-in for a couple of days until we butchered it.

The craftsman at his bench. Thanks, Chris!

The day came, along with a text from Ben saying that he'd come down with a fever and needed to change plans. With visions dancing in my head of me driving around the city with a half pig in the back of the truck, looking for someone to help cut and wrap it—yes, I can be a drama queen—Ben offered to see if his head butcher, Chris Carter, could step in.

Chops for days!

Spending a couple of hours in a freezing walk-in may not be most folks' idea of a good time, but watching a whiz like Chris work through a carcass is pretty awe-inspiring, and getting a few tips on deboning a belly and skinning cuts without mangling the meat was well worth it. (The right kind of knife and making sure it's well-sharpened are a great place to start.)

Bones roasted and ready for the pot.

Two hours later we were done, and I was on my way with my pig packed in nice white paper packages in a chest cooler. Of the 125-pound carcass, only the skin, less than five pounds, wasn't used—bones, fat, trim, leaf lard and meat all came home. If you're interested in the particulars, Kendra charges $3.50 per pound for the hanging carcass (after the internal organs are removed); the processing fee I paid to Mt. Angel was $32.50; and Chris's butchering fee was $50.

Just add water!

Frozen immediately after butchering, the meat will last a year, until we buy our next pig. We'll make stock (popularly known as "bone broth") after roasting the bones, and we'll use the leaf lard for baking after it's rendered. The trim meat goes into the grinder along with some of the fat to make bulk sausage, and any remaining fat will be rendered and used in frying and cooking. I call it a pretty darn good deal for a year's worth of very fine eating.

Pork Stock ("Bone Broth")

Bones from half pig, including backbone, tail, etc.
1 large onion, roughly chopped
2 ribs celery, roughly chopped
2 carrots, roughly chopped
2 bay leaves

Preheat oven to 400°.

Thaw bones, if frozen, and place on large sheet roasting pan. Place pan on middle shelf of the oven and roast for 1 hour. Remove from oven and place bones in stock pot big enough to cover bones with water. Add onions, carrots, celery and bay leaves to the pot, then fill the pot with cold water to cover the bones. Bring to a low boil, then reduce heat to lowest setting and simmer for 12 to 24 hours, occasionally removing scum that may rise to the top. Cool and strain. Freeze in containers. Keeps for up to a year.

Wednesday, September 23, 2015

Braising Weather: A Pot of Beans


It's officially fall. The ash trees surrounding our house are turning golden, coloring the light that spills in the kitchen windows. The leaves that have fallen are dry and crispy, crunching under the feet of the neighborhood children walking to school. The urge to kick through the drifts of leaves on the parking strip is almost impossible to resist, and I can hear that most autumnal of sounds as the kids (and sometimes their parents) succumb to their siren song.

Willowood Farm Rockwell beans.

Nighttime temperatures are getting down into the 40s, requiring the addition of thick comforters to the beds, and mornings are brisk, with just enough of a chill to require pulling on a fleece jacket to walk the dogs first thing. The days warm up to the 70s by noon, and a glass of wine on the porch of an evening as the sun sets isn't out of the question just yet, warmth-wise.

This is what my parents used to call nigh-perfect Indian summer weather in the Northwest, though I'm beginning to think of it more and more as the onset of braising weather, time to pull out the Dutch oven for the season of low and slow-cooked meats and vegetables.

The finished beans.

This year's crop of dried beans have begun showing up at the farmers' markets, and I was recently gifted some Rockwell beans from Willowood Farm on Washington's Whidbey Island. This variety was originally grown by an island pioneer, Elisha Rockwell, in the late 1800s, and it was brought back into production recently by farmer Georgie Smith when she took over the land her family had been farming on Ebey's Prairie since the 1890s.

Beans don't need much besides water, onions and garlic to make a mighty tasty main course, served with a hunk of hearty bread and maybe a drizzle of olive oil, but I happened to have a pig trotter (top photo) from the Square Peg Farm pig I'd butchered last winter. Beans and pork are a natural pairing, and the fattier the cut of pig the better. Trotters are almost all fat, and over several hours it gave a porky unctuousness to the pot. A half pound of bacon works well, too, and can be chopped or shredded before or after braising. Even a pound of pork shoulder will do its work on the beans, and can be shredded afterwards to make a beany, porky chili.

Regardless of how you decide to cook them, grab a few different kinds of beans from your local farmers' market and take them for a spin in a pot. I guarantee you'll find one (or more) you'll love, not to mention they'll warm up your family's bellies on these crisp fall nights.

Basic Braised Beans

1 lb. dried beans
3 Tbsp. olive oil
1 onion, chopped roughly
3 cloves garlic, chopped fine
Water
1 Tbsp. salt, plus more to taste

Optional:
3 bay leaves
Pork (pig trotter, 1/2 lb. bacon, 1 lb. pork shoulder)

Depending on the type of bean, you may need to soak them overnight in water (cover by 2"). Check with the farmer or follow directions if they're packaged. Drain prior to cooking.

Preheat oven to 300°.

On top of stove over medium heat, add oil to pot and heat until it shimmers. Add onion and sauté until tender, then add garlic, sautéing briefly until it's fragrant but not browned. Add drained beans and cover with fresh water by 1". Add salt and stir briefly. Add bay leaves and pork if using.

When it comes to a simmer, cover the pot and put it in the oven for at least four hours or until beans are tender and meat (if used) is falling apart. Check occasionally and add water to cover if the beans have absorbed it all (the amount of water needed will vary with the type of beans and if they have been presoaked). If meat has been used, remove it to a cutting board and chop or shred it, then add it back to the beans.

This can also be done on top of the stove. Simply keep the beans on a low simmer, covered, and check occasionally to make sure all the liquid hasn't absorbed.

More bean recipes: Baked Beans Italian Style, Backyard Barbecue Beans, Mexican-Style Black Bean and Greens Soup.

Saturday, August 15, 2015

Budget Cuts: Rolled Stuffed Pork Loin


At $6.99 per pound, it's not a steal, but for some fine eating for a decent price, pork loin is a good place to start, and they're often on sale at our supermarket butcher counters. We usually cook it on the grill, searing it directly over the coals then moving it to the side so it can achieve maximum succulence.

Slice roast lengthwise through the middle, but not all the way through.

One way to assure juiciness in what can often be a rather dry cut of pork is to stuff it with something savory, whether a mixture of greens and herbs—a garlic pesto or kale stuffing would be awesome—or, what I've been doing lately, a variation on Dario Cecchini's treatment with garlic, fennel pollen, salt and rosemary.

Open like a book, then slice horizontally through the left side.

Prepping the roast for the stuffing process is extremely easy. The simplest method is to snip off the twine binding the roast, turn it so the short end is toward you, then slice it halfway through the long way, stopping before you slice all the way through. Open the roast like a book, slather it with your stuffing, then roll it up starting at the right-hand end. Using some butcher's twine (available at most markets), tie the roast in three or four places.

Repeat with right side, open flaps and spread with stuffing.

The other method is a little harder but gives a much more satisfying result. Slice and open the roast as above, then make a shallow slice down the center, again stopping before you go all the way through the roast. Then make a horizontal slice to the left from the center cut to the end, stopping before slicing it through. Repeat going from the center to the right side. Open these two flaps and you'll end up with a long slab of meat that you can slather with stuffing and roll up from one end to the other.

Roll up, tie and roast…easy!

Grilling takes close to an hour, and roasting it in the oven at 400° will take about the same amount of time. If you don't mind heating up your house by turning on the oven—I'm writing this in the middle of a very warm NW summer—a really great thing to do, which gives you an instant side dish, is to roast the meat on top of root vegetables, as in this recipe. I usually aim for an internal temperature of 125° to 130°, then remove it from the grill or the oven, cover it with aluminum foil and let it rest for fifteen to twenty minutes before slicing.

Here are some stuffings to try: Kale and Pine Nuts, Nettle Pesto. The stuffing pictured above is a cilantro pesto. Try it with green garlic, carrot top pesto, or a flavorful combination of greens and herbs.

Thursday, June 05, 2014

Ben Meyer: Making Sustainable Meat Accessible


Ever since the first time I met Ben Meyer, I've wanted to write a story about his passion for local food systems. Today you can read my story about him in The Oregonian.

The first thing to note about Ben Meyer is not his polite Midwestern manners, his oh-so-Portland uniform of stocking cap, flannel shirt and scruffy beard or that he's opened two restaurants in what were then—and still are, to some extent—underserved areas of the city. It's not even that he's been interviewed by the likes of Forbes and the Wall Street Journal wanting to hear about the local pasture-raised beef and pork he features on his menus and in the butcher case.

The key to Meyer is that this evangelist for whole animal butchery, whose walk-in is chock-full of large cuts of dry-aged beef, some as old as 80 days, spent 10 years as a vegan. Growing up in northern Indiana, he said all he knew was industrial agriculture.

"I grew up surrounded by hogs and soy and corn in the Midwest—northeastern Indiana—and basically saw nothing but factory farms, never thought there was anything different," he said.

Already politically active, he became a vegan because he didn't want to support a food system he saw as intrinsically unhealthy for himself, the environment or society. A move to an organic farm on the lush agricultural land of Washington's Vashon Island was eye-opening, and his preconceived notion of what a healthy food system looked like was blown out of the water.

Read the rest of the article, titled "At Old Salt Marketplace, chef Ben Meyer makes whole animal butchery his primary mission," to find out what turned Meyer from a full-time vegan to an evangelist for sustainable, accessible local food systems.

Tuesday, September 03, 2013

Taking the Cure: Home-Smoked Bacon


There are very few things that draw me like a moth to a flame like the smell of smoked meat. I've been known to wander around the neighborhood, my nose in the air, tracking the smell of cooking meat as it wafts on the breeze until I locate the source of the intoxicating aroma. Even my dogs start looking at me askance as we cross streets willy-nilly, though their puzzlement is likely a fraction of the muttering from other pedestrians I'd occasionally (and even literally) run into.

Fresh pork belly.

Bacon was high on the list of favorite smoked meats, and I'd sampled all kinds from Trader Joe's to Gartner's, and quizzed friends on their favorite sources. Then Dave found a smoker on Craigslist and got a yen to try making it himself, with, yes, lots of encouragement from me. That first batch, one slab weighing five pounds, was a smashing success, earning accolades from family and friends alike. Which, of course, encouraged him to make more, increasing the amount each time.

The experience of working with the smoker, and the resulting briskets, ribs (flat and rolled) and smoked albacore has begun pulling him away from briquets and into the realm of wood. He's now got sources for cherry, apple, hickory, oak and maple, with bags of same stashed alongside the smoker in the garage.

Cured belly ready for the smoker.

Today's batch of bacon—briquets providing the primary heat source, with chunks of dry apple wood soaked in water providing the smoke—was the biggest yet. Two full bellies weighing just shy of twenty pounds total, cured for a week in the fridge (details here) then smoked for a little over three hours. Which resulted in around 16 1/2 lbs. of finished bacon. Once they cool down, we'll slice them into one-pound chunks, then throw them in zip-lock freezer bags, except for a bit we may need for a completely homemade BLT or perhaps some carbonara.

Seriously, if you've been thinking about making your own bacon and you can get your hands on a smoker (I repeat: Craigslist), this is so easy to do and, as long as you follow the directions for the curing, a complete cakewalk. Your family and friends will thank you!

Tuesday, March 05, 2013

Spare But Not Skimpy: Chinese Braised Spare Ribs


It's no surprise I would find a package of spare ribs in the freezer that'd been packed in there over a year ago, the very last remnant of Roger the pig. I mean, there are dust bunnies in our house that could be considered "vintage." And there was the time our son finally got tall enough to see the top of the fridge and I caught Dave frantically signalling him to not say anything about the quarter-inch of dust he could see there. The boy couldn't help himself, of course, and my response was to hand him a sponge…funny how he's never remarked on it since.

Montinore Estate's verjus…awesome!

Anyway, back to the spare ribs. When they thawed out I found a teensy bit of freezer burn on one corner, but otherwise they looked fine. After cutting off the little burn and figuring neither the weather outside nor the age of the ribs merited the traditional barbecue treatment, I remembered a dish we'd had recently that featured braised spare ribs.

A little research yielded a few recipes that gave me an idea of ingredients and timing, so I cobbled together what sounded good and what I could fill in with ingredients from the pantry. The brilliant part, if I do say so myself, was substituting verjus for the stock or wine called for in the other recipes. Its mild, slightly vinegary flavor seemed, at least to my mind, to go with that sweet-sour taste I love in Asian dishes.

It turned out to be a door-buster of a dish, the succulent meat not quite falling off the bone, and definitely fit for guests when I make it again (and I definitely will). In fact, if I'm not mistaken, there are some spare ribs from Petunia out in the freezer someplace. I'll just have to dig them out.

Chinese-style Braised Pork Spare Ribs

1 1/4 c. verjus, white wine or rice wine
1/3 c soy sauce
1/4 c hoisin
6 cloves garlic
1/2 onion, coarsely chopped
2 whole dried hot red peppers
1/2 tsp. ground coriander
1/2 tsp. ground cumin
2 lb spare ribs
Cilantro, finely chopped, for garnish

Preheat oven to 300°.

Put all ingredients except spare ribs in medium sized Dutch oven over medium heat and bring to a boil, stirring to combine. Add spare ribs and return to a boil. Cover and place in oven for 1 1/2 hrs.

Remove from oven and pour off juices into skillet, leaving ribs in covered pot to stay warm. Bring juices to a boil and reduce by half or until it thickens to a sauce-like consistency. Skim off fat (I used my glass fat separator). Put ribs in serving bowl and pour sauce over top. Garnish with chopped cilantro.

Monday, February 25, 2013

The Joys of Butchering


Last night we totally ignored the Oscars. Not intentionally, or in protest over the annual Sturm und Drang that churns up every year, dominating everything for weeks ahead of the event.

It was because our neighbors are planning to remodel their kitchen and I'd highly recommended the contractor who did ours. This, of course, necessitated a viewing of his handiwork and a discussion of the process involved in what is often a fraught undertaking. Which, in turn, provided the opportunity to suggest a live demonstration in the form of drinks and dinner the next weekend.

The drool-inducing standing rib roast.

It had been awhile since we'd pulled some Petunia out of the freezer, and grilled chops were sounding pretty tempting. So the day before the dinner I opened the freezer and pulled out three white paper packages labeled "2 Rib Chops." Now, it had been a little over two months since Linda and I had done the butchering, and I was a little foggy on some of the finer details of the decisions I'd made.

Assuming that the packages contained two chops each, I figured six would more than feed five people, so I set them out to start thawing. A few hours later I peeled off the paper and the plastic wrap and discovered that, instead of the six inch-and-a-half thick chops I expected, there were three humongous three-inch thick pieces, more like three small roasts (top photo).

Portioning Petunia.

That's when the memory rushed back of that long, cold day on the back porch at Ayers Creek Farm, working through the carcass and deciding what cuts to make, choices that would determine so many future meals. I remembered looking at the gorgeous section of the primal containing the backbone and the ribs, and the decision to cut one long five-rib roast (above left), destined to be the star of our Christmas dinner, and several double-rib chops.

The reasoning behind the double chops was two-fold: first, the way the backbone was constructed, it was easier to slice between every two ribs rather than every rib and, second, those huge chops would be singularly impressive to pull out for dinner sometime. And that's what I'm gradually learning is the true joy of butchering my own meat: I'm not only getting familiar with the structure of an animal, I get to make choices as to how it's divided, which then gives more choices for how to prepare it. Combined with the fact that I know exactly who raised the animal, what it was fed and where it was raised, as well as knowing that my money is going to support a small family farmer in my area who produces a sustainably and responsibly raised animal.

Though he'd never grilled pork chops that size, Dave decided to treat them like a pork roast, searing them over the coals, then pushing the coals to the side and roasting the chops over indirect heat. Moist, tender and luscious, these were chops that more than did right by the pig they came from. Thank you again, Petunia!

Photo of Petunia by Clare Carver.

Sunday, January 20, 2013

Praising the Braise


I am lucky to have great friends who are great cooks. When we get together, whether for dog walks, coffee or grabbing a table someplace to catch up, the conversation inevitably, and not surprisingly, turns to food—what we've been eating recently, what we've been cooking, where to get great ingredients.

The roast shoulder, pre-shredding.

And they're used to me perpetually asking for their recipes, and if it just may be, might be okay to publish them on the blog. Pretty please?

Michel and I were out with our dogs, hers a gorgeous flat-coated retriever named Shona, who is the long-legged love of Walker's life and a new favorite friend of Kitty's. As they romped their way around the wet, grassy field at a nearby school, she mentioned a lamb dish she'd whipped up for a recent dinner.

Taco-licious.

Now Michel has a serious history with food, so when she starts raving a recipe, my ears perk up. This one was for short ribs, but she said it would make a great braise for pork, beef or chicken. With most of Petunia still sitting in the freezer, I latched onto the pork idea and, on arriving home, dried off two very wet dogs and pulled a big shoulder roast out of the freezer.

The next night we had pork tacos with rice and a quick slaw, with a roasted poblano crema made from peppers I'd stashed in the vegetable bin. The pork also made some awesome pulled pork sandwiches that Dave was thrilled to pull out of his lunchbox, and the last of it got mixed in with roasted tomatoes and tossed with pasta.

So what I'm saying is that the recipe below is limited only by your imagination, and would go from company's-coming to warmed-up-for-lunch. Thanks, Michel!

Short Ribs Braised in Coffee Ancho Chile Sauce

This would be fabulous with lamb and pork, too.

4 dried ancho chiles, stemmed, seeded, ribs discarded
2 c. boiling-hot water
1 medium onion, quartered
3 garlic cloves, coarsely chopped
2 Tbsp. finely chopped canned chipotle chiles in adobo plus 2 teaspoons adobo sauce (optional)
2 Tbsp. pure maple syrup
1 Tbsp. fresh lime juice
3 tsp. salt
4-6 lb. beef short ribs or flanken (or in my case, pork shoulder)
1 tsp. black pepper
1 Tbsp. vegetable oil
1/2 c. espresso or strong French press coffee

Preheat oven to 350°F.

Soak ancho chiles in boiling-hot water until softened, about 20 minutes, then drain in a colander set over a bowl. Taste soaking liquid: It will be a little bitter, but if unpleasantly so, discard it; otherwise, reserve for braising. Transfer ancho chiles to a blender and purée with onion, garlic, chipotles (if using) with sauce, maple syrup, lime juice and 1 teaspoon salt.

Pat ribs dry and sprinkle with pepper and remaining 2 teaspoons salt. Heat oil in a 12-inch heavy skillet over moderately high heat until hot but not smoking, then brown ribs in 3 batches, turning occasionally, about 5 minutes per batch. Transfer as browned to a roasting pan just large enough to hold ribs in 1 layer.

Carefully add chile purée to fat remaining in skillet (use caution, since it will splatter and steam) and cook over moderately low heat, stirring frequently, 5 minutes. Add reserved chile soaking liquid (or 1 1/2 cups water) and coffee and bring to a boil, then pour over ribs (liquid should come about halfway up sides of meat).

Cover roasting pan tightly with foil and braise ribs in middle of oven until very tender, 3 to 3 1/2 hours. Skim fat from pan juices and serve with ribs.

Michel's note: Ribs improve in flavor if braised 2 days ahead. Cool, uncovered, then chill, surface covered with parchment paper or wax paper and roasting pan covered with foil. Remove any solidified fat before reheating.

Kathleen's note: When the pork was done, I removed it to a board and shredded it as seen in top photo, fat and all. The shredded meat then went into a large skillet with enough of the sauce to moisten it. It was kept warm while taco ingredients were prepared, then served.

Get the roasted poblano crema recipe that goes ever-so-well with the pork tacos. Get another of Michel's incredibly delicious recipes: Braised Lamb Shoulder.

Wednesday, January 09, 2013

On the High Wire with a Big Hunk of Meat


I've always had a certain fear of large hunks of animal flesh.

I know, I know…you're thinking, "But Kathleen, weren't you just butchering half of a pig (your second) just a couple of weeks ago? Wazzup?"

Herb marinade ingredients.

So I guess I should modify my phobia: my fear is cooking a large hunk of animal flesh and ruining it. And there's nothing like eight-plus pounds of gorgeous standing rib pork roast to make my knees start knocking. Add in the fact that it was the main course for Christmas dinner with company and you've got the makings for a world-class disaster, one I'd never hear the end of.

"Remember the time you practically burned down the kitchen and ruined Christmas dinner?" The words echoed in my head.

All dressed and ready.

Then there was the fact that I'd decided to use a recipe for a fennel, lemon and herb marinade I'd read in the New York Times. Problem was, Melissa Clark, whose recipes I like and trust, had used it on a crown roast, not a standing rib. So aside from the rub itself, all her other sage advice about how to make it the crowning achievement (no pun intended) of the dinner was pretty much useless.

I nevertheless forged ahead, pulled the roast out of the freezer in plenty of time for it to thaw, made the rub and got it marinating on Christmas morning. Dinner was scheduled for evening—we're not mid-day holiday diners—and I made sure I had a couple of instant-read thermometers that actually worked.

Coming off the bone.

With the size of the roast, I was estimating two or two-and-a-half hours. It was originally going to go on the grill, another holiday tradition, but the weather was awful (bone-chilling cold and rain) and Dave was threatening to come down with a cold. So into the oven it was going. Our guests came, we drank and snacked and I checked the temperature starting about 90 minutes in.

The carving…whew!

The roast itself had gone in the roasting pan backbone down, with the ribs sticking up, following Clark's instructions to roast it at 450° for 20 minutes, then at 350° for the remainder of the cooking time. We'd decided on pulling it when it reached 135°, then letting it rest for twenty minutes. I was the designated carver, and with some sound advice from the guys in attendance I sliced down under the ribs and against the backbone. This freed the roast completely and it plopped onto the cutting board in one piece, making it possible to simply slice the roast into what looked like boneless chops. As a bonus, I also sliced between the ribs and piled them on a side plate for those of us who like to have something to gnaw on.

Truly succulent, it was indeed a glorious achievement, one I'll definitely be proud to hear about in the future. And though I'm not totally over my fear—high-stakes occasions are always at least somewhat fraught—I'll definitely have more confidence the next time I try this type of high-wire act.

Fennel, Lemon and Herb Rub for Pork
Adapted from The New York Times

1 1/2 tsp. fennel seeds
Rosemary leaves from 2 bushy sprigs
5 garlic cloves, coarsely chopped
1/4 c. sage leaves and tender sprigs
Finely grated zest of 1 lemon
1 tsp. fennel pollen (optional)
1 Tbsp. coarse kosher salt
5 Tbsp. extra-virgin olive oil
1 tsp. cracked black pepper

Place fennel seeds in small dry skillet over medium heat until they are fragrant, about 1 minute. Keep moving them around the pan so they don't scorch—you're just trying to bring out the essential oils. Combine all ingredients in a blender and process until they make a paste. Rub all over pork roast* and allow to marinate in the fridge for at least 2 hours or overnight.

* If you're using a pork leg roast or rolled roast, you can untie it and rub it inside the roast as well. Then you can retie it or roast open-faced, either way.

** The USDA recently modified the cooking temperature for pork to 145°…we feel that's still a bit high, but you should use your own judgment.