Showing posts with label Real Good Food. Show all posts

Friday, May 31, 2019

Breakfast? Dessert? Company? Try This Versatile Olive Oil Cake!


I've been posting contributor Jim Dixon's recipes for years, and his approach to cooking with whatever's in season with minimal fuss is right up my alley. Right now he's expanding Real Good Food's selection of imported and local goodness—olive oil, spices, vinegars, sauces, etc.—and moving to a new location in order to bring more tastiness to Portland's tables. More on his grand opening in a future post, but for now here's his latest twist on a classic olive oil cake!

Olive Oil Cake with Fennel Pollen

I adapted this recipe from Tenuta di Capezzana, the Tuscan winery and olive oil producer, and it uses more extra virgin olive oil than any other olive oil cake recipe I've seen.

3 eggs
1 1/2 c. sugar
1 1/2 c. extra-virgin olive oil
1 1/2 c. milk
2 c. whole wheat flour
1 tsp. baking powder
1 tsp. sea salt
2 Tbsp. fennel pollen*

Preheat the oven to 350 F.

Cut a circle of parchment paper to fit a 12-inch cake pan (I usually make this in a 12-inch cast iron skillet); drizzle some olive oil into the pan, then place the parchment paper and slide it around so it’s well-oiled.

Blend the eggs and sugar together in a medium-sized bowl, then stir in the olive oil and milk. In another large bowl combine the flour, baking powder, salt and fennel pollen. Make a well in the dry ingredients, and slowly add the egg mixture, stirring just until blended.

Do not over mix. Pour the batter into the prepared pan on top of the parchment paper.

Bake until a toothpick inserted into the center comes out clean, 50 to 55 minutes. Let the cake cool completely, then loosen the sides with a knife, and invert onto a serving plate (hold the plate against cake pan and flip…hopefully it will come out in one piece). Remove the parchment paper, slice, and eat.

* In response to a question posed on Facebook about the taste of fennel pollen, Jim had this to say: "Fennel pollen, more accurately called fiore di finocchio in Italian since it contains bits of flower and pollen, has the same flavor as fennel seed but a bit more delicate. It's a key ingredient in porchetta, and the stuff we sell at Real Good Food comes from Monte San Savino in Tuscany, where a lot of the roadside porchetta trucks get their stuffed suckling pig roasts. I like it on salmon, too."

Monday, April 22, 2019

Simple Seasonal Supper: Pasta with Rapini & Pork


This time of year, when tender spring greens are bursting with flavor, the best meals are often the simplest. I agree with contributor Jim Dixon of Real Good Food that the combination of the inflorescences of various brassicas are fabulous combined with a good pasta (fresh or dried) and pork (fresh or cured).

It's officially spring and we can't seem to leave the farmers market without bundles of "spring raabs." Whatever you call them, we love to eat them.

Pasta with Rapini & Pork

Rapini and pork make a delicious combination—served over pasta it is a classic southern Italian dish.

The slightly bitter turnip greens are also called brocolli raab, cima de rape (head of the turnip), brocolli di rapa, or rape, and they're members of the Brassica family of cabbage cousins.

A quick bath mellows the bitter tang of rapini, and then it’s dragged around a skillet in plenty of olive oil and garlic. [If you like that bitter tang, like I do, omit the next step, chop them and go straight to the skillet after washing. - KB]

First, cook the rapini in well-salted boiling water for about 4 minutes; fish it out with tongs and let cool in a bowl.

Cut the rapini stems and flowers into pieces about 2 inches long, add them to a skillet (with the water clinging to them) with extra virgin olive oil and a few cloves of chopped garlic, and cook for about 5 more minutes.

Put the cooked rapini in a bowl and set aside.

Use the same skillet to cook a pound of ground pork with some olive oil over high heat until browned, then add a good pinch of oregano, another of fennel pollen, a teaspoon of fennel seeds, and a good pinch of sea salt. Stir in the cooked rapini and turn off the heat while the pasta cooks.

For 4 servings, cook a half pound of pasta in salted boiling water for about 12 minutes [I'd normally use a full pound of dried pasta for four servings, but we're hungry folks. - KB], Using a slotted spoon or small sieve, scoop the pasta into the skillet with the pork and greens; add a big spoonful of the pasta water and cook everything together for a couple of minutes. I like to serve this with a drizzle of good olive oil, some grated Parmigiano Reggiano or Pecorino Romano, and a pinch of flor de sal with piri piri chile. [Red pepper flakes or other ground hot peppers like cayenne are also great. - KB]

You can get the following from Jim at Real Good Food, online or at his store: Pollinaria's whole grain extruded pastas, made with an organic heirloom durum wheat variety called Senatore Capelli, carry the flavors nicely. Pantellerian oregano has an out-of-this-world flavor that makes the bulk stuff at the store pale in comparison. Jim also carries Burlap & Barrel Desert Fennel seeds, Necton’s flor de sal and the piri piri chile.

Wednesday, January 02, 2019

Guest Essay: Ode to a Cabbage


I can't think of anyone I know who adores cabbage more than contributor Jim Dixon of Real Good Food, as evidenced by this essay, an updated version of one first published here in 2015. Whether fresh, sautéed, braised, pickled, fermented or fried, you'll still find it making an appearance on his table. Here he shares some history, as well as his favorite ways to prepare it. 

I love cabbage.

And I’m not talking about Savoy cabbage, the frilly version that’s been tarted up with a first name hinting of royalty. Or the other members of the Brassica oleracea family, including the various kales and collards, broccoli, kohlrabi, cauliflower, and Brussels sprouts, deliciously gorgeous as they are. Or the strangely compelling relatives from central Asia, original home of turnips, broccoli rabe, bok choy, tatsoi, and mizuna, all part of the Brassica rapa clan.

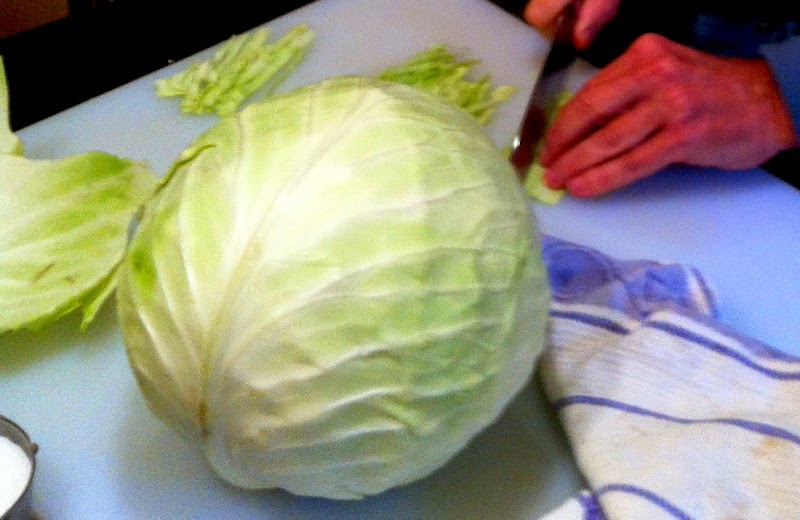
No, my heart belongs to the ordinary, everyday cabbage, its pale green leaves tightly bound into a waxy ball, the humble heads tucked coyly away in the corner of the produce section. It’s cheap, reliable, and flexible; who wouldn’t fall in love?

It doesn’t hurt that cabbage is good for me, lends itself to last-minute cooking, doesn’t cost much and grows, relatively speaking, in my own backyard.

Humankind’s relationship with Brassica started early. In his encyclopedic work Food: An Authoritative and Visual History and Dictionary of the Foods of the World, Waverley Root relates one ancient Greek belief of its origins: Dionysus, the god of wine, caught Lycurgus, the Edonian king, pulling up grapevines. While awaiting punishment, the king wept, and from his tears sprang cabbages.

An alternate myth has Jupiter sweating as he tries to explain contradictory oracles, and the cabbages sprout from his perspiration.

Those ancient Greeks might’ve been on to something. But given my devotion it seems more likely that Eros, the god of love, was involved.

Wild cabbages, resembling kale more than my beloved green globes, grew along the Mediterranean coast, and according to Harold McGee, in his book On Food and Cooking, the “salty, sunny habitat accounts for the thick, succulent, waxy leaves” that make cabbages so hardy. Domesticated about 2,500 years ago, cabbage spread across Europe.

Because it tolerates cold weather, cabbage became an important staple farther north, and we typically associate it with the hearty cuisines of climes damp and gray.

But the Romans, like me, loved cabbage, and they’re probably responsible for the selective cultivation that resulted in so many disparate variations. By encouraging an existing tendency for the curling leaves to form more tightly packed bunches, those early Italian farmers created today’s well-known “heading cabbages.”

Our name for these derives from the colloquial French word for head, caboche. Vegetable lore tells us that the Italian Catherine de’ Medici brought cabbage to France when she married fellow 14-year-old Henri de Valois, the Duke of Orleans and, eventually, King Henry II. History is silent as to whether she called him mon petit chou, or “my little cabbage.” But the endearment reflects the continuing French love of cabbage, from the choucroute of Alsace to the thick stew called gabure in the south.

Early cabbage fanciers also associated it with good health. Egyptians ate it with vinegar to prevent hangovers, Greeks dribbled cabbage juice into sore eyes, and Romans packed aching muscles with cabbage poultices. Herbalists today recommend cabbage for its anti-inflammatory effects, telling breastfeeding mothers to tuck a few bruised leaves into their bras for relief. It’s got lots of vitamins A, B, C, and E, and a study at Georgetown University showed how phytochemicals in cabbage might reduce cancer risks.

However, those same phytochemicals provide the frequently noted boardinghouse smell of overcooked cabbage, something that bothers others much more than it bothers me. Maybe I’m blinded, in an olfactory sense, by love, suffering from a cabbage-passion-induced anosmia. Or perhaps my approach to cooking mon petit chou reduces the breakdown of glucosinolates, the sulfur-containing compounds released when cabbage is boiled too long.

More likely, it’s the variety of cabbage. Brussels sprouts contain more of the healthful and stinky compounds than any of the other Brassicas. Heading cabbages, with their residual sugars, offer a sweeter love.

Farmers here in the Pacific Northwest harvest cabbage from mid-July through the end of December. Properly stored, it keeps for up to six months, so it’s theoretically possible to eat local cabbage all year. Prices vary, with conventionally grown cabbage usually less than a dollar per pound, organic about half again as much. Just before Christmas I bought an enormous head at a farmers’ market for only two dollars.

So, how do I love cabbage? Let me count the ways.
  1. I love it cooked in a little olive oil with onion. There’s a head of cabbage in the refrigerator and onions in the pantry most of the time, so I make this almost every week. But cabbage loves pork, and I love them together. So start with a little diced bacon, then sauté the onions and cabbage in the smoky fat. A dollop of crème fraîche makes both of these simple dishes unctuous and rich.
  2. A bed of shredded cabbage roasted under a chicken steals my heart.
  3. I love how the cabbage I add to my feeling-a-cold-coming chicken soup gives it enough substance to fill me up.
  4. I’m crazy for coleslaw, the green salad I turn to when winter’s lettuce comes wilted from a long truck ride north and again when the hot summer sun makes my garden’s leaves bolt and turn bitter.
  5. Je t’aime, choucroute braisée à l’Alsacienne: Julia Child kindled new passion for sauerkraut by teaching me to simmer it slowly for hours in crisp white wine.
  6. Marcella Hazan makes me cry, “cavolo sofegao, come sei bella,” with her Venetian-style smothered cabbage, another slow-cooked dish transformed with a splash of vinegar.
  7. Te amo cocido, tambien. While these one-pot Spanish stews often call for whole chickens, pigs’ trotters, veal shanks and a garden’s worth of vegetables, I make a simple version with just garbanzos, potatoes and cabbage.
  8. Louisiana-style smothered cabbage makes me ask, "how's ya mama and dem?"
Cabbage love comes in many other forms, and though the steady routine of our long-term relationship provides familiar comfort, I don’t want it to get stale. So I keep searching for new outlets for my passion, different ways to express my feelings, unexplored culinary territory where I can say, again and again, I love cabbage.

Tuesday, September 04, 2018

Cast Iron Cooking: Tomato Cornbread


Reading recipes has always inspired me, and even those I'm annoyed by can contain the seeds of a good dish. Contributor Jim Dixon of Real Good Food shares one of those that he used despite quibbles with its moniker.

Tomato Cornbread

A recipe in the Washington Post inspired me, but the name, "Savory Tomato Cornbread Cobbler," is both too long and misleading. "Savory" is just superfluous food porn, and cobbler, while not really precisely defined, really requires the batter portion on top. It's not exactly a pie, but nether is the tamale version. Whatever you call it, it tastes good.

Put a nine-inch or so cast iron skillet (or similar baking dish) in a 350° oven. Cut three or four tomatoes into bite-sized pieces, add a bit of chopped garlic or shallot, some chopped herbs (basil, mint and parsley for me; if you don't have any growing in your yard, just use basil), a splash of one of the the Katz vinegars and the same for oil. I used about 2-3 cups of this tomato mix.

The cornbread is a simple hot water version made with extra virgin olive oil instead of butter or lard. The real star is the cornmeal: I used Ayers Creek Amish Butter, but the purple Peace, No War would also work (I've got both in stock). Mix a cup of cornmeal with a teaspoon of sea salt and 2 tsp. of baking powder. Add a cup of boiling water and one of extra virgin olive oil, mix well. It'll be a little oily, but that's okay.

Pull the hot skillet from the oven, pour in the cornmeal batter, and spread out into a smooth layer. Spoon the tomato mix on top, distributing evenly. Bake for about 45 minutes, and let cool. I like it best at room temperature.

Check out more of Jim Dixon's recipes on Good Stuff NW!

Thursday, August 02, 2018

Got Tomatoes? Get Gazpacho!


In tomato season, a big pitcher of gazpacho on a sweltering day served with a thick slice of crusty artisan bread (the better for sopping) is my idea of the perfect no-cook meal. Here's contributor Jim Dixon's recipe that I made just the other day.

Gazpacho Sevillano

Julia Moskin's article a few years ago about the gazpacho of Seville appeared in the New York Times when the temperature here in Portland was bumping up to triple digits. I probably wasn't the only one who connected a tall glass of cold tomato goodness with the overloaded plants in my backyard. I've made her Seville-style gazpacho a couple of times since, and it's not just great a good way to use up an abundant harvest; it's delicious. Drink it on its own or serve a piece of grilled fish in a pool of the creamy gazpacho.

Follow her recipe if you like, or just wing it. This much will make a full blender: five to six medium tomatoes; one small cucumber, peeled if it has a thick, waxy peel [I like the small Persian cukes that you can chop and throw in whole. - KAB]; one poblano, Anaheim or similar green pepper (not a green bell); half a medium onion; two cloves garlic. Cut into rough chunks, put in the tomatoes first (they'll liquify quickly and pull in the the other stuff); add a shot of good vinegar (Katz apple cider, sparkling wine, or red wine), a few pinches of sea salt, and blitz until very smooth. Then add a lot (a half cup at least) of extra virgin olive oil while the motor is running. Chill or serve with ice, and add a little water if it's too thick to drink easily.

Moskin calls for straining out any solids, but don't bother. You want all that fiber, and it's just another thing to clean. And while a blender works best, your food processor can do the job.

Wednesday, May 09, 2018

Not Your Mother's Boiled Vegetables: Italian Bagna Cauda


I had my first taste of the classic Italian dipping sauce, bagna cauda, at Portland's late, legendary temple of Italian food, Genoa. At the time it was co-owned by chef Cathy Whims, before she opened her equally legendary Nostrana just a few blocks away. Contributor Jim Dixon of Real Good Food, like Whims, was inspired by Marcella Hazan, who introduced classic Italian food to American tables.

Boiling Vegetables

Many cooks think boiling vegetables is culinary heresy. If you've suffered through Brussels sprouts or cauliflower boiled to gray mush you'd probably agree. It's also true that some water soluble nutrients are lost when vegetables are boiled. But done right, boiling helps make vegetables delicious, and you can make up for any nutrient loss by simply eating more vegetables.

If you need more convincing, pick up Tamar Adler's excellent book, Everlasting Meal: Cooking with Economy and Grace. Its opening chapter, "How to Boil Water," will make you hungry.

But the basics are, well, basic: fill a pot with water (about 2/3 full; the vegetables need to fit, too), add salt (about one teaspoon per quart), boil, add vegetables. That last part is the key. Things with thick stalks, like broccoli, should be cut into pieces that let the thick part cook at the same rate as the tin parts. I cut cabbage into quarters with the core attached so the leaves stay together. Cauliflower goes into the pot whole, core down for two minutes, then flipped over for one more.

For most vegetables, three to five minutes seems like the sweet spot for getting them tender without overcooking. But stick the tip of a knife into the thick part; if it slides in easily, it's done. And I start timing when they go into the pot, not when it returns to a boil. Fish them out of the pot, let them drain a little, and they're ready. And use that water to cook more than one thing; cook another vegetable, make pasta in it, or save it for soup.

Bagna Cauda

Literally "hot bath," this classic sauce from northern Italy most often accompanies a plate of raw vegetables. But I was reading Brett Martin's 2018 best new restaurants article in GQ and a related piece about favorite meals of the chefs at the listed places, and the dish that jumped out was simple poached* vegetables with bagna cauda. So I made some.

Marcella Hazan's recipe is the definitive one, but if you can't find salt-packed anchovies, oil-packed work fine. Heat some extra virgin olive oil and butter (about 2/3 oil, 1/3 butter) until the butter foams, add some chopped garlic and and anchovies, cook for another minute, and serve warm with a little salt. Arrange some boiled vegetables on a plate and drizzle generously with the bagna cauda.

* Poaching is just like boiling but at a lower temperature; it does sound fancier, though.

Monday, March 05, 2018

Farinata, A Dream Come True


Contributor Jim Dixon of Real Good Food has traveled extensively to find small, family-owned producers of exquisite oils, grains, salt and herbs, so his travel advice is worth heeding. As are his recipes, as the one for farinata, below.

I ate farinata for the first time in the Ligurian village of Levanto, just up the coast from the Cinque Terra, more than 10 years ago. Judith and I had spent a wet October day hiking the trail connecting the five towns, and the Cinque Terra rail pass lets you travel between La Spezia and Levanto, the hamlets just beyond the north and south ends of the five towns. So we rode the train to the sleepy seaside resort hoping to dry out a little.

As we wandered around, I'd ask the shopkeepers where they ate, my standard practice for finding good local food instead of the stuff meant for tourists. We ended up at a pizzeria away from the beach, back up the hill toward the train station.

We planned to grab a quick bite before riding the train back to La Spezia to pick up the car and drive "home" to the Tuscan village of Chianni. But I saw something that clearly wasn't pizza come out of the wood-burning oven; nothing on top, just a plain-looking golden pie in a darkly patinated copper pan. I asked what it was, the pizzaiolo said "farinata," and handed me a slice. I thought about the slightly crispy edges and soft, custard-like interior for years, dreaming about finding it somewhere closer to home.

Farinata

Farinata is a simple flatbread made from chickpea flour, water, salt, and olive oil. The humble ingredients belie the rich flavor; it's hard to believe that there's no cheese. And it's fairly easy to make, enough that I can't believe I waited so long to try.

Mix chickpea (aka garbanzo) flour with about twice as much water; for a 12 inch farinata I use a cup of flour and 2 cups of water. It's important to let the flour hydrate completely, so let the batter sit for at least 30 minutes or even overnight (longer is better). Add a teaspoon of salt and a generous pour of good extra virgin olive oil (about 3 tablespoons). I like the traditional addition of fresh rosemary, so I'll stir in a tablespoon or more of it, lightly chopped.

Set your oven hot to 400°, move the rack to the top slot, and put a 12 inch cast iron skillet inside until it gets nice and hot, about 20 minutes. When you're ready to bake, add enough extra virgin to the hot skillet to completely cover the bottom; swirl it around to get up the sides a bit, too. Pour in the batter, slide the skillet into the oven, and cook for about 20 minutes. It's done when the top is lightly browned and the edges are pulling away from the pan. It's best hot, but it's not bad the next day.

Thursday, January 25, 2018

Southern Style: Tomato Gravy


Contributor Jim Dixon of Real Good Food loves the Northwest, its people, its farms, its producers and its food, but he has a special fondness and respect for Southern foodways. Here he shares a favorite recipe for a Southern version of gravy.

This is not Italian-American Sunday gravy, the long-cooked tomato sauce used for the week's pasta dishes. Southern tomato gravy has its roots in Appalachia, where the cold winters meant produce had to be put up when it was ready. Tomatoes in the garden meant canned tomatoes for the pantry. Ronni Lundy, one of the founders of the Southern Foodways Alliance and part of the hillbilly diaspora, says that "tomato gravy is a quick winter fix intended to remind you of the sharp tang of the summer garden."

Love that there are lots of roasted tomatoes put away!

And gravy, traditionally made with flour-thickened drippings from some kind of cooked meat, makes a little something extra from a few scraps, something that any cook can appreciate. Gravy adds flavor to simple, filling foods like rice, grits, biscuits or potatoes. While you could use just olive oil for this tomato gravy, some bacon grease will give it the real flavor of Appalachia. Tomato gravy was traditionally served with cornbread, rice, or biscuits, but it's also great with beans, especially red peas.

Chop an onion and a couple of cloves of garlic and cook them with a good pinch of salt in a few tablespoons of bacon grease or extra virgin olive oil (or a mix of both) for a few minutes, preferably in a cast iron skillet. (Sometimes I'll also add a little chopped celery and some kind of pepper, often a seeded and chopped jalapeño.) Sprinkle about a tablespoon of flour into the skillet, stir it in and cook for another minute or two until it just begins to color. Add a 14-oz. can of crushed or diced tomatoes (I like Pomi brand) [You can also use a quart of those tomatoes you roasted this summer. - KB] and a small drizzle of cane syrup or sorghum syrup, if you have any. Add a healthy amount of freshly ground black pepper, more salt if needed, and simmer for about 15 minutes. It should be thick, like, well, gravy.

Monday, December 04, 2017

Caponata with a Twist: Winter Squash!


'Tis the season for all kinds of squash-y deliciousness, and contributor Jim Dixon of Real Good Food has a great idea for a vegetarian main dish.

Using winter squash instead of eggplant for this Sicilian classic wasn't my idea, but it's a really good one. I've written before about my preference for the big, pumpkin-y Cucurbit varieties, and since they provide a lot of squash to eat, I'm always looking for another way to use them. But you can make this with any good winter squash. You'll want about three cups of cut up squash.

Cut the squash into roughly 3/4-inch chunks (if you have any leftover roasted squash, cut it into bite-sized pieces and add after cooking the other vegetables). Toss it into a skillet slicked with extra virgin olive oil and cook over medium heat. Chop and toss in a red onion, a couple of celery stalks, 2-3 cloves of garlic, a good handful of green olives, and a couple of tablespoons of whole capers. Add a good pinch of salt, too.

When the squash is tender (maybe 15 minutes), add a splash (2 tablespoons or so) of Katz Trio red wine vinegar, a healthy squirt of Three Brothers cane syrup (or a couple of tablespoons of sugar or honey), and about 2 tablespoons of tomato paste. Cook for another 5 minutes to let the flavors blend, then sprinkle with a few pinches of oregano. Drizzle with more extra virgin on the plate.

You can eat this warm as vegetable side, but I like it best at room temperature with good bread.

Tuesday, November 14, 2017

Green Bean Casserole, Redux


I just realized that Thanksgiving is next week, not two or three weeks in the future as I had somehow convinced myself. Luckily I contacted my turkey connection this last week, congratulating myself for being so ahead of the game. (Oops!) So now the long list of possible sides is being compiled, to be added to the "must haves" of turkey, mashed potatoes, gravy and pie, and the voting and deal-making is getting fierce. Real Good Food contributor Jim Dixon's recipe for reconstructed green bean casserole, using still-in-season foraged chanterelles, is high on the list.

Green Bean "Casserole"

I can't eat the old school version anymore, but I came up with this homage that provides the same flavors but tastes much better. If you can get chanterelles, use them, but any mushrooms will work.

Slice a pound of mushrooms and put them in a skillet with some salt but no added fat [or oil] over medium high heat. The mushrooms will start giving up water right away, and you want to cook them in their own juices until it's almost gone before adding a generous drizzle of extra virgin olive oil. (If we're having the usual November weather, chanterelles can be very wet, and this technique concentrates the flavor and improves the texture. It also works with most mushrooms.)

After you add the oil, add a finely chopped shallot and a good shot of dry sherry (a good fino is perfect). Let that bubble away for a few minutes, then add a pound of green beans that you've cooked in boiling, salted water for 3 minutes and drained. Pour in about a half cup of heavy cream, bring to a boil, and cook for a maybe 5 minutes or until the cream has thickened and the beans are tender. Adjust the salt, add some black pepper if you feel like it, and serve topped with crispy fried onions from a can (Lars is a Danish brans sold at New Seasons that's better then the ubiquitous French's). You could make your own or substitute bread crumbs or nuts, but I think some kind of crunchy topping is required. Have a great Thanksgiving.

Saturday, October 21, 2017

A Way (or Two) with Brussels Sprouts


Contributor Jim Dixon of Real Good Food loves to burn his food. Not to a crisp, but to crispy, taking advantage of the Maillard reaction between amino acids and reducing sugars that gives browned food its distinctive flavor. In the recipe below he applies to one of my favorite fall vegetables, brussels sprouts.

Caramelized Brussels Sprouts Two Ways

I think the key to keeping these little cabbages delicious is cooking them over high heat. They brown nicely and get tender without becoming mushy. Use a heavy skillet, preferably cast iron, and plenty of extra virgin olive oil. Here are two different recipes, both starting with the same stove-top approach.

Cut a pound sprouts into quarters lengthwise. Some of the outer leaves may come off, but keep them with the quartered sprouts. Let the oil heat over medium-high for about a minute, then add the sprouts. Stir frequently and cook until the sprouts have browned nicely on all sides. I like mine fairly dark, right at the edge of being burnt, so I cook them for about 15 minutes.

1) With Stoneground Mustard

I learned this from Jason French (chef-owner at Ned Ludd) and David Padbergwhen they cooked at clarklewis here in Portland. I've adapted it a little, but the flavor is still the same.

After the sprouts are browned, add a chopped onion, a healthy pinch of salt, and cook for another 10 minutes. Stir in about a quarter cup (more is better than less) of stoneground mustard. Cook for another 10 minutes or so, taste for salt, and serve.

2) With Honey & Sage

When the sprouts are caramelized, add a chopped red onion, a healthy pinch of salt, and about 2 tablespoons of chopped fresh sage (maybe 8-10 leaves, depending on the size). Cook for about 10 minutes, then add about one tablespoon each of honey and Katz Trio red wine vinegar. Cook another minute, adjust the salt, and serve.

And check out this recipe for a Brussels Sprouts Salad.

Monday, August 28, 2017

Salad Smackdown: BLT Salad!


When the heat of summer hits and tomato season finally rolls around, one of my favorite summer salads-for-dinner is a big ol' panzanella. Starting with a triumvirate of stale bread, juicy tomatoes—especially those squishy super ripe ones that have been sitting on the counter a little long—and leafy green lettuce, then tossed with any other garden veg you have (cucumber, beans, you name it) and dressing, it's dinner in a bowl! Here contributor Jim Dixon of Real Good Food adds his two cents-worth.

BLT Salad

I ate the first tomatoes from my garden this week, and I've got another week before a lot more will be ripe. But it's officially tomato season in Portland (almost always toward the end of August). Here's one way to add even more tomato-y goodness to your plate. (If you're not growing any, look for the dry-farmed Early Girls at New Seasons; they taste like home-grown tomatoes.)

To make this more than just a tomato salad with bacon, start by toasting the bread in bacon fat. Cook about a quarter pound of good bacon until it's crispy. Set the bacon aside and add a couple of handfuls of cubed bread to the bacon fat. If there's not enough to really coat the bread, add some extra virgin olive oil. Toast the bread on the stovetop or in the oven until it's lightly browned.

Chop a few tomatoes into bite-sized pieces, shred some iceberg lettuce—unfairly maligned but perfect for this; you could use romaine if you can't get past your iceberg prejudice—and crumble the bacon. Stir together about a quarter cup of good mayo, 2 tablespoons each of Katz Gravenstein apple cider vinegar [regular cider vinegar works, too] and extra virgin olive oil, and 3 tablespoons buttermilk. [I added a tablespoon of Dijon mustard just 'cause] Combine everything and toss well with flor de sal and freshly ground black pepper. BLT in a bowl!

See more Salad Smackdown recipes for easy salads with big, bold flavors.

Tuesday, August 15, 2017

Samfaina: Spain's Ratatouille


Contributor Jim Dixon's been on a tear lately over the cooking of Spain, inspired by the release of his pal Robin Willis's new cookbook from Bar Pinotxo in Barcelona. Here's his version of one of the legendary bar's signature dishes.

With basically the same ingredients and cooking technique, samfaina usually gets tagged as Spanish ratatouille. But Catalonians would argue that their neighbors to the north are really just making French samfaina. We can leave the wrangling to the nationalist gastronomes and just be happy it's the time of year when all of the produce used in making this summery dish are abundant and delicious.

Samfaina

To make samfaina, you'll need an eggplant, a zucchini or two, an onion, some kind of not-very-hot pepper (green preferred, but not a green bell pepper unless that's all you can find), a clove or two of garlic and a few good tomatoes. (If you're a fan of the version served at Bar Pinotxo in Barcelona, add raisins and pine nuts to the shopping list; add the raisins with eggplant, toast the nuts and add at the end.)

Start by chopping the onion and cooking long and slow in plenty of extra virgin olive oil. While the onion is getting soft and golden brown, cut your tomatoes in half (across their "equator" so the stem end is on one half). Most recipes, including Pinotxo's, tell you squeeze out the seeds, but the seeds and their surrounding "jelly" contain most of the umami-rich glutamates, so leave them in. Rub the cut tomatoes gently across the large holes of a box grater (over a bowl, natch) until all that's left is the peel.

Add the grated tomato to the onions with some salt and cook for about 15 minutes (or longer) until they've thickened. Cut the eggplant, zucchini, garlic and pepper into small pieces and add. Cook over low heat for at least an hour (or, if you have time, put the skillet in the oven at 200° for a few hours, checking and stirring every once in awhile).

In the end you want a thick, jam-like sauce. You can eat samfaina by itself, spread it on grilled bread, set a piece of fish on it, spoon it over chicken, or stir it into a bowl of garbanzos. It tastes like slow-cooked summer.

Wednesday, July 26, 2017

Bar Pinotxo in Barcelona: A Portland Connection


A fellow named Robin Willis, a former Portlander and a filmmaker, artist, writer, bon vivant and friend of contributor Jim Dixon of Real Good Food, was in town recently with his new book "Bar Pinotxo: God is in the Garbanzos" about the "history, stories, and recipes from the 17 stool chiringuito in the most famous mercado in the world." (See video, above, and be sure to turn on the closed captioning.) This legendary bar is in Barcelona, where Willis now lives, and he recently shared a recipe from that book.


As Jordi [Asin, the chef at Bar Pinotxo] says, “good food comes from poor cultures… a rich culture has everything they want but those with less have to get by, refine, reuse and make the best out of simple ingredients” and like the vast majority of Spanish and Catalan dishes it is the simplicity of the technique and the quality of ingredients that make this dish so magical, sensuous, tasty and in this case, a little bit... dirty.

"Now how do I eat this?”

Another aspect of life in Iberia is that people here are not afraid to touch each other, things and food... both theirs and that that technically belonging to others. When they cook they dive in with both hands as naked as the day they arrived in this odd and beautiful place. Poking, squeezing, wiping, tasting…sometimes licking. Obviously, here when it comes to microbes it’s the more the merrier and considering that Spain has the healthiest population in Europe it must be working.

With this in mind here’s a potential eating scenario: Undoubtedly you will start by picking the clams out of their shells with your fork… and you might just stab an errant chunk of briny egg. Soon you will realize that much of the egg has affixed itself to the shell and ultimately to the meat of the clam. The residual heat has pretty much melded their molecules or at least glued them together pretty damn well. What are you going to do, go for the low hanging fruit? The big chunks? The easy pickings…and leave the rest on the plate? You are not one of those people who leave behind pizza bones, are you?

God bless you for your propriety, and this plan of attack may be the correct and tidy thing to do but you will miss out on all of the good stuff and you will go away hungry and frustrated. Give up and give in…put down that fork, grab one of those tiny mollusks, spread the shells apart, stick out your tongue and get busy. OK…I could get really descriptive about the sea-i-ness and salt-i-ness and the firm rigid texture of the clams and how this contrasts with the warm soft suppleness of the eggs and how you have to use your tongue and your teeth to scrap them off of the rock hard shells…and how it seems oh so beautiful but at the same time oh so obscene and forbidden but just oh so right…but I shan't…I shall leave some things up to imagination. Just go for it.

Scrambled Eggs with Very Small Clams

Serves 2 as a main dish or more as tapas.

Big dash of extra virgin olive oil
300 grams (10 oz.) of really fresh tallerinas [1] [very small clams like littlenecks]
50 grams (2 oz.) of thinly sliced onions
2 or 3 high quality, free range eggs from very happy chickens [2]
Sea salt flakes [3]
Twist of freshly ground black pepper or a dusting of Pimenton de la Vera [4]

Secret cooking tool: 1 glass pan lid…and it has to be glass because you have to see what’s going deep inside the pleasure dome. (Jordi and company put the clams directly on the griddle and use an old pyrex bread pan. They also have a quarter inch of callouses on their fingers. Trust me, use the pan lid.)

Beat the eggs well.

Pre-heat a skillet to medium—relax, no matter what you do it will come out really tasty—unless you go for a half hour jog or something while it's cooking, now that's a different story. Add the olive oil. Let the oil heat up a second of two then lower the heat then fry the onions very slowly until golden and then add them to the beaten eggs. Frying onions at a low temperature is part of the "sofregit" Catalan karmic cooking experience.

Toss in a little more oil and add the tallerinas. Now quickly cover the pan with the pan lid (you are in effect making a steamer). Paying attention, you will notice that in a short while the tallerinas will open and release this amazing sea juice that was trapped inside their shells. Once all the clams have opened (and this is the tricky part because you want as many of them as possible to open but you also don't want all the juice to evaporate) remove the lid and toss in the eggs and onion mixture then lightly oscillate everything with a wooden spoon.

Cover the pan and watch closely. Once the eggs are just “cooked” (and by this I mean they have just turned opaque... undercooked is better than overcooked) switch off the heat. The residual temperature of the pan and the clams will finish cooking the eggs. Slide the eggs and the clams (which have now become one, more or less) into shallow bowls. Add a sprinkle of the salt, a crack of pepper or a very light dusting of the pimenton and serve while it’s still warm.

[1] These are very small clams. But bigger ones work fine too. OK... steamers... no geoducks! 
[2] In Spain we have amazing chickens. Small, wiry and happy and sadly for them, really tasty. They are sort of the Antonio Banderas of poultry... and they make amazing eggs that need no refrigeration. Nevera? Nevera? We don't need no stinkin’ Nevera!
[3] I once almost got into a fist fight over the concept of "finishing salt." Apparently it's the salt you finish with as opposed to the salt you start with. Nonsense! Any good, flaky sea salt will do. Maldon is great stuff as is the smoked stuff from Brittany. What you want is wispy little pillows of salt. No rock salt pellets, please.
[4] Oh my how I love this stuff. Smoky, round, dusky…Pimenton de La Vera is to generic paprika what bacon is to olive loaf. People have to stop me from putting it on ice cream. It comes but from one small county in the harsh and wild province of the aptly named Extremadura.

Monday, June 12, 2017

Need a Vacation? Take Your Mouth to Portugal


I love to travel, but sometimes it's just not possible to jump on a plane and leave the world behind for a week or three. That's when I start planning for a foreign vacation right in my own back yard, with rosé chilling in a tub in the dappled sunlight beneath our oak tree and myriad plates of tapas like this one from contributor Jim Dixon of Real Good Food.

Portuguese Marinated Carrots

These are often served with drinks as a petisco, the Portuguese version of a tapa. Cut three or four carrots into roughly half inch slices (I split them lengthwise, then slice crosswise) and cook them in well-salted boiling water for about 10 minutes. You want them just barely tender, not soft.

While the carrots cook, make the marinade by stirring together a tablespoon of honey or sugar with a couple of tablespoons of Katz Sparkling Wine vinegar [regular white wine vinegar works, too], then adding four tablespoons of extra virgin olive oil. Toast a couple of tablespoons of cumin seeds in a dry skillet for a few minutes until they're aromatic and just starting to brown.

Drain the carrots and add them to the dressing along with the cumin and a couple of cloves of finely chopped garlic. Chop a nice handful of cilantro and add it; add salt and freshly ground black pepper to taste. If you can, let this sit for an hour or more. It's not traditional, but I like a little red pepper heat, and if you like things hot, add something spicy, like a pinch of cayenne. (In a few weeks I'll have some of Necton's new flor de sal with piri piri chile at my Activspace store, and it's really good sprinkled over the carrots.)

Serve these with good olives and a nice drizzle of extra virgin. If it's sunny, open a cold bottle of vinho verde and pretend you're in the Algarve.

Tuesday, May 16, 2017

Rhubarb and Carrot Olive Oil Cake


Like contributor Jim Dixon of Real Good Food, I grew up eating stewed rhubarb in the spring, and was even known to gnaw on a raw stalk once in awhile. In adulthood, chewing on the raw product has gone by the wayside, but having as much as I can is still a priority at this time of the year.

Every year when I see the first rhubarb at the farmers market I'm reminded again that I didn't plant some in my own garden. The one year I did remember, I was too late; I planted the crown in the fall and never saw it again (early spring is the time…I could've looked it up). Rhubarb is my favorite pie filling, and I grew up eating bowls of it simply stewed with sugar. These days I mostly roast it with olive oil, usually with either honey or cane syrup.

But I'm occasionally inspired to do more. After making Nigella Lawson's Venetian carrot cake and liking the unusual, not-too-sweet and very Italian dessert, I thought it would be a good vehicle for eating more rhubarb.

Grate a medium-sized carrot and put the results on a paper towel to soak up some of the liquid. Cut 6 to 7 stalks of rhubarb into half inch pieces (about 2 cups or so). I mixed together a half cup each of cane syrup and extra virgin olive oil (sorry Nigella, but if you don't use extra virgin olive oil you might as well use plain vegetable oil), then added 3 eggs, a teaspoon of vanilla, a shot of bourbon, and the zest and juice from a smallish lemon.

I stirred in about 2 cups of almond flour and added the grated carrot and sliced rhubarb. Parchment paper got cut into a circle to fit a 7-inch cast iron skillet (a cake pan or pie tin would be fine), and I drizzled a little more extra virgin over it to grease the pan. I poured in the thick batter, added a generous sprinkle of blanched, slivered almonds to the top, and baked it at 350° F for about 45 minutes. Nigella calls for a topping of mascarpone with powdered sugar and rum (or bourbon, for my version), but I like a little whipped cream with cane syrup and whiskey.

Rhubarb is also awesome in other desserts, made into syrup or mixed in a cocktail…check out these other fantastic rhubarb recipes!

Tuesday, April 18, 2017

The Basics: Flower of Salt (aka Flor de Sal)


Considering it's one of the simplest and most common culinary ingredients, salt is a surprisingly complex subject. Contributor Jim Dixon of Real Good Food gives some background.

I started importing flor de sal when I realized that everything I ate was drizzled with olive oil and sprinkled with coarse salt. I had, and still have, a French-made Peugeot cast aluminum salt grinder (salt mills must have ceramic grinders so they don't corrode; pepper mills have metal grinders). I'd fill it with chunks of traditional sea salt and grind some over my food after I'd anointed it with oil.

Salt ponds in the Algarve region of Portugal.

Then, almost 15 years ago, I read Corby Kummer's article in the Atlantic. Kummer described a culinary salt journey much like mine, moving from the hard square crystals of refined table salt to the pyramind-shaped flakes of kosher salt to the softer, more nuanced, flavor-enhancing qualities of traditional sea salt. He swooned over fleur de sel, the light gray sea salt from the marshes of Brittany, even if the price gave him sticker shock. But he'd just discovered something better, flor de sal, Portuguese flower of salt from the hot, sunny Atlantic coast called the Algarve.

It took me about a year to get my first bags of flor de sal from the idealistic young marine biologists who started Necton, the company that harvests salt the way the Romans did when they lived along the same coast. All it takes to make flor de sal are the sun, the sea and somebody to skim the delicate crystals from the water after they start to bloom. Flaky salts like Maldon and Jacobsen come from boiling the sea water over gas fires until most of the water evaporates.

Only about 10% of the salt in the salina is available as flor de sal. As the crystals grow, they sink to the bottom and are raked out as traditional sea salt. The larger crystals can be used for cooking, where they dissolve, or are ground into fine sea salt.

We keep a few bowls of flor de sal in the kitchen so it's easy to grab a pinch. Fingers are the best way to add salt, too; bacteria can't grow on the salt (except on the ocean floor near a volcanic vent). And everything I eat gets a drizzle of olive oil and a few crystals of flor de sal.

Why Not Kosher Salt?

Diamond Crystal kosher salt, the most widely used brand, is made by Cargill. For me, that's enough reason not to use it. I'd rather my food dollars went to companies, big or small, that share my values about corporate responsibility, environmental protection and eating real food.

But sea salt harvested specifically for using with food also tastes better. More than 90% of the salt produced around the world is destined for industrial uses, everything from making PVC pipe to de-icing roads. And most industrial users want pure sodium chloride, NaCl. Salt mined from the earth, all of which came from prehistoric oceans, can be nearly 99% sodium chloride. Large producers of sea salt that use evaporative ponds can drain excess brine while the salt crystals are forming, washing away the trace elements found in sea water.

The relative handful of sea salt producers who only make culinary salt allow the sea water to evaporate completely, so all of the magnesium, calcium, potassium and other trace elements found in the ocean stay in the salt. Sea salt can be less than 90% sodium chloride, and the presence of the trace elements buffers the natural bitterness of pure salt. Try this: fry two eggs (in olive oil, of course), then salt one with kosher or table salt and other with a good sea salt or flor de sal. You can taste the difference.

Top photo from Wikimedia. Photo of Algarve salt beds from Jim Dixon.

Monday, March 20, 2017

Eating of the Green(s)


With the vernal equinox upon us, called Nowruz ("new day") in the Persian calendar and considered the first day of spring in the New World, I've been jonesing for fresh, green things—think nettles, fiddleheads and other early foraged greens. Fortunately for me, contributor Jim Dixon of Real Good Food has had exactly the same thoughts, and he shared a recipe I'm going to be putting on our table soon.

While the faux Irish celebration of green beer and corned beef has passed, colcannon should be in regular rotation on your dinner table.

Santo Patricio's Colcannon

This an Italian-Irish version of the Irish classic. You can harvest nettles right now (almost anywhere along any river west of the Cascades, but Sauvie Island is a good place to start) or look for them at the farmers' market.

Cook a couple of sliced leeks in olive oil with a good pinch of salt for a few minutes, then add three peeled yellow potatoes cut into rough cubes about 3/4 inch thick. Cook for about 10 minutes, letting the spuds brown just a bit, then add 1/2 cup heavy cream. Cover, reduce heat and simmer until the potatoes are tender, about 15 minutes.

While the potatoes are cooking, drop a bunch of stinging nettles into boiling water. Pull the greens out with tongs after about 30 seconds (heat neutralizes the chemical sting), drain, let cool, and finely chop about 2 cups. Save the rest (and the nettle broth) for another use, maybe fritters.

When the potatoes are done, stir in the nettles. Season with freshly ground black pepper, and check the salt. Cook for a minute or two, then serve hot drizzled with a little more extra virgin.

Monday, January 23, 2017

Meyer Lemon Relish Makes Cauliflower Sing


I adore Meyer lemons and try to use them as much as possible when they're in season. This year I made preserved lemons, the better to enjoy them long after they've disappeared from store shelves. Contributor Jim Dixon of Real Good Food chops them into a relish that he can serve with grilled fish or mix with any number of blanched vegetables and salad greens. Thanks, Jim! 

It wasn't that long ago (okay, maybe it was 20 years) that the only way to get a Meyer lemon was knowing someone in California with a tree in their backyard. The citrus, thought to be a cross of lemon and tangerine, actually arrived from Asia in the early 1900s. Less acidic and puckery than the common Lisbon and Eureka lemons, Meyers also have thin, aromatic skins and a lovely fragrance.

Cauliflower with Meyer Lemon Relish

This relish, a twist on the traditional Italian herb sauce called gremolata, comes from an Alice Waters recipe for slow-roasted salmon in the 1999 Chez Panisse Cafe Cookbook. It's good with fish and almost everything else.

Drop a whole head of cauliflower into a pot of salted boiling water; pull it out after 3 minutes and let cool. Make the relish by cutting a Meyer lemon into quarters lengthwise, slicing the central white core from each quarter and removing the seeds. Then chop the lemon finely. [Preserved Meyer lemons, chopped as indicated, would be fabulous, too.]

Combine the chopped lemon with a finely chopped shallot, a quarter cup or so of chopped flat-leaf parsley, about a tablespoon of chopped chives, a tablespoon of Katz sparkling wine vinegar, a pinch of salt and a couple of tablespoons of extra virgin olive oil. Let this sit for a few minutes while you chop the cauliflower (use the core, too; just chop it into smaller pieces). Toss the cauliflower with the relish, add more salt and a little black pepper and drizzle with more olive oil. Serve cold or at room temperature.

Sunday, January 08, 2017

Smothered Cabbage, Louisiana Style


Contributor Jim Dixon of Real Good Food is our local conduit for all things from New Orleans. With a kid (and now grandchildren) in the Big Easy, he's got an even better reason than food to spend lots of time there. As long as he keeps bringing back (and sharing) his recipes, I'm all for it!

There are lots of foods different cultures eat for good luck in the new year, including greens of some kind (some say it's because money is green). According to Gulf Coast chef John Folse, in Louisiana they'll be eating smothered cabbage on New Year's Day. But this old school recipe is so good you'll want to eat it all year.

Smothered Cabbage

Folse's recipe calls for andouille, the deeply smoked sausage of Cajun country, but it's hard to find the good stuff here in the northwest. You can order it from Jacob's or check with with the butcher shop at Laurelhurst Market [or Old Salt Marketplace], but you can smother cabbage with just bacon if you can't wait.

Start by cooking a quarter pound or so of chopped bacon in a little olive oil (if you've got andouille, cut it into bite-sized pieces and cook it with the bacon until brown). When it's browned, add a chopped onion, about half as much chopped celery, and a small green bell pepper, also chopped. While those are cooking, chop a couple of cloves of garlic and a tablespoon or so of fresh thyme; toss them in, along with salt, black pepper, and a half head of green cabbage cut into 2 inch pieces.

When the cabbage has wilted a little, add a quarter cup of water, cover, reduce to a simmer, and cook about 25 minutes. As Folse notes in his recipe, it might seem overcooked, but that's they way they like in Louisiana. Everybody I've served this to feels the same way.