Sunday, January 30, 2011

Classes for the Masses


Ever wish you could wield a chef's knife like a pro? Or make sushi at home that's as good as the expensive stuff in Japanese restaurants? How about breaking down whole animals into their component parts?

Two Portland chefs, both instructors at local culinary schools, have started up a cooking school for the rest of us called Portland's Culinary Workshop. Its mission is to teach us to have more confidence in the kitchen, not only in using tools but by getting hands-on experience in braising, preparing smashing meals with raw foods and making salads and burgers sing with vinaigrettes and aioli mayonnaise (just a few of the plethora of offerings).

The difference between these classes and others in the city is the cost, most under $65, and that they all contain a big fun factor, like a class called "Mind Your Meat Mistress" that teaches about different cuts of meat, how to cook them to make the most of their flavors and then how to cut up a whole chicken. Chef Melinda Casady (left in top photo), one of the two owners, teaches this class and is known across the city for her butchering skills, as well as her ability to debone a chicken with lightning speed while blindfolded. (Whether she'll be wearing leather and carrying a whip remains to be determined.)

Susana Holloway (right in top photo), the other half of the pair and, in the interests of full disclosure, a good friend and neighbor of mine, will be bringing her mastery of technique along with a knowledge of international cuisines gleaned from her upbringing in Brazil and other countries. An incredible gardener, she's also going to be offering a class called "Plot to Plate" about making meals from food you grow yourself or, as the class description says, you'll "find out what grows together and goes together."

Another unique feature are lectures with an emphasis not just on cooking but on understanding the dynamics of our food system and how to make choices that promote our own health and that of the environment. With titles like "Feed Your Body: Nutrition 101," "Science Geeks in the Kitchen," "Exploring Genetically Modified Foods" and "The Shopping Dilemma, the Ethics of What We Buy," these promise to be loaded with useful info for making responsible decisions.

The two also plan to teach folks to make their own baby food, cook for special diets, and have continuing education classes for culinary professionals as well as team-building classes for companies that want to boost morale and encourage teamwork. Plus they've committed to displaying two blackboards that are dedicated to their current passions like must-have kitchen tools, favorite restaurants, food movies and produce. Can you imagine anything more fun?

Details: Portland's Culinary Workshop, 807 N Russell St. 503-512-0447.

Thursday, January 27, 2011

Improve on Perfection? You Be the Judge!


Passion is a funny thing. I've been on a Meyer lemon tear for the last couple of weeks and, even as I type this, two of the yellow-orange orbs are sitting on my kitchen counter begging to be used. Their smooth skins cry to be caressed and their scent is perfuming the whole room.

I've squeezed their juice into a crab risotto. A curling strip of peel has done its magic as the final touch in our house Negroni. And just the other day Dave ran across a recipe that called for the juice of Meyer lemons in a Whiskey Sour. The original Whiskey Sour, using regular lemons, is considered a perfect cocktail, so the possibility of improving on perfection was tempting.

"Should we give it a try?" he asked. Mais oui!

With balance like Olga Korbut, it's one of those cocktails, as my brother is wont to say, that's waaaaaaaaay too easy to drink. It's the perfect pre-dinner cocktail, not too heavy or sweet, an aperitif rather than a gut bomb. And if you want to give your guests a choice of tart or sweet, take a page from Vancouver, BC, bartender Shaun Layton of L'Abattoir and swipe just half the rim with a curve of extra fine sugar. Freaking brilliant!

So what's the next recipe that's going to send me into paroxysms of Meyer lemon lust? Preserved lemons? A Meyer lemon pie? I can't wait to find out!

Meyer Lemon Whiskey Sour
Adapted from Nora Maynard in The Kitchn

1 1/2 oz. whiskey (rye or bourbon)
1 oz. freshly squeezed Meyer lemon juice
1/4-1/2 oz. simple syrup*, according to taste
Amarena cherry
Sugar rim, optional

Place all ingredients in a cocktail shaker with ice. Shake vigorously and strain into a cocktail glass (with optional sugar rim). Drop in an amarena cherry. Makes one cocktail.

* Simple syrup: Equal parts sugar and water and heated in a saucepan on the stove, stirred until the sugar dissolves completely, then chilled.

Tuesday, January 25, 2011

Crustacean Celebration: Crab Risotto


You see, I was watching this show called "Fringe" on the laptop after listening to Brian Greene talking about the existence of an infinite number of parallel universes, called the multiverse, on Fresh Air. (And yes, I'm an NPR junkie.) As Terry gamely tried to ask intelligent questions of the quantum physicist, you could actually hear her brain start to wheeze as it struggled to absorb the advanced concepts involved. (My favorite question was when she asked Greene if his pals in physics circles think he's off his nut.)

I was glad I had the simple, straightforward, science fiction-y TV series about a parallel universe where different outcomes exist, and the way that even small acts can have enormous consequences down the road. Stuff we all can get our heads around, right? Plus they talk about food a fair amount, like a recipe for the perfect strawberry milkshake.

But what got me on this tangent was the fantastic crab risotto that we had for dinner as we huddled around the screen, watching Walter, Peter, Olivia and Astrid try to figure out what the Watchers were up to this time. And I sincerely hoped that in a few parallel universes they have crabs as wonderful as our Dungeness, and that in at least one parallel dining room a little family bearing a striking resemblance to ours was having this bit of creamy comfort before crab season ends.

A Very Crabby Risotto ( or Lemony Crab Risotto)

2 Tbsp. butter or margarine
3 Tbsp. olive oil
1/2 c. shallots, finely chopped
2 c. arborio rice (I used Fior di Riso, an Italian variety)
1 c. dry white wine
2 c. fish stock, warmed
2 c. chicken stock, warmed
1/4-1/3 c. Meyer lemon juice (regular lemons can be used, as well, and chopped preserved lemons would be great)
1 tsp. lemon zest
1/2 c. green peas (thawed if using frozen)
1 egg yolk
1/2 c. parmesan, plus additional for garnish
1-2 lbs. crab meat (I used the meat from two small crabs)*
2 Tbsp. chives, finely chopped

Heat butter and oil in medium saucepan over medium heat, then add onion and garlic and sauté until golden, 2-3 minutes. Add rice and stir to combine, approx. 1 min. Add white wine and stir until absorbed. Combine warmed fish and chicken stocks, then start adding stock a cup at a time until rice is slightly al dente. Remove from heat and add lemon juice, lemon zest, peas, egg yolk, parmesan and 1 Tbsp. chives all at once and stir rapidly to combine. Add crab meat and fold in gently so it doesn't break up too much. Garnish with remaining chives and serve immediately with additional parmesan for sprinkling.

* If you're bringing servings to the table rather than serving family style, you can reserve an appropriate number of larger chunks of crab for garnish.

Check out this season's Crustacean Celebration series: Pasta with Crab and Radicchio, Deadly? I Think Not, The Big Boys Weigh In and Let Them Eat Cakes. See also: last season's series starting with Hot Artichoke and Crab Dip (and links to other posts in the series).

Monday, January 24, 2011

How Do I Love Thee?


Who doesn't love little fried cakes? Contributor Jim Dixon of Real Good Food has been cataloging the many and varied forms that fritter love can take, and shares another one of them here.

As you may know, I like to make little fried things I call fritters, usually with some kind of vegetable. Sometimes I’ll cook the vegetable just to make the fritters, but more often I use whatever leftovers I have around.

This batch began as roasted sweet potatoes and parsnips, but would work with just sweet potatoes (either orange or white-fleshed, cooked just to make fritters) or any other combination of root vegetables. Roasting concentrates and caramelizes the sugars in the sweet potatoes, so the leftovers would be my first choice. The farro is a nice addition, but could also be left out.

Roasted Sweet Potato, Parsnip and Farro Fritters

Combine a cup or so of coarsely mashed leftover roasted sweet potatoes and parsnips with chopped shallot, a half cup of cooked farro, a pinch of sea salt and a quarter cup of freshly grated Parmigiano Reggiano. Break an egg in to the mix and stir, then add a quarter cup or so of good bread crumbs. The mixture should hold together in a spoon; you can add another egg if too dry, more breadcrumbs if too wet.

Use enough extra virgin olive oil to coat the bottom of a heavy skillet; heat until the oil begins to ripple. Use a pair of spoons to form walnut-size fritters. Slip carefully into  the oil and flatten gently. Cook until brown (these brown more quickly because of the sugars in the sweet potatoes, so watch them), then turn and cook the other side. Sprinkle with flor de sal and eat hot. Makes about 8-10 fritters.

Saturday, January 22, 2011

Farm Bulletin: Patience Is a Hard Virtue


This week's bulletin from contributor Anthony Boutard of Ayers Creek Farm, nestled in the sylvan hills of the Wapato Valley near Gaston, is short, sweet and pungent.

Shy on greens this week. We are waiting for the late winter growth to start, and it will. We should have more for the next two markets. Once the shift happens, the greens start to grow quickly, and will double in two weeks. The sun is riding higher and the day is increasing. In the meantime, we drum our fingers.

Friday, January 21, 2011

Budget Cuts: Fit to Be Tied


There's something about seeing a large hunk of pork in a meat case for $3.99 a pound that calls to me, especially when it's a sustainably and humanely raised pork leg roast. While lots of folks love the loin, that cut tends to be very lean, lacking the fat that makes the roast moist and juicy. I also happen to think the leg has a lot more flavor, kind of like the difference between chicken breast and thigh meat.

In this roast, the removal of the leg bone leaves a nice slash through the leg that's perfect for filling with whatever stuffing ingredients you happen to have on hand. A stroll through Epicurious gave me the inspiration I needed to use some leftover prosciutto, a lemon, some breadcrumbs and garlic for a different twist on a more traditional stuffing.

Even better, in the process of rummaging through the vegetable bin I pulled out a couple of yams, a turnip and some kale from the farmers' market. Then it occurred to me that the yams and turnip would be perfect roasted with the pork, and the kale would make a hearty salad alongside.

A little over an hour or so later we were sitting down to what I have to say was a winner of a dinner on the cheap, one that I'd be proud to serve next time guests come over. Just promise that you won't tell anyone how cheap and easy it is, OK? It can be our little secret…

Pork Leg Roast with Lemon and Prosciutto Stuffing and Roasted Vegetables

For the pork leg:
1 4-lb. pork leg roast
4 slices prosciutto
1-2 lemons, sliced crosswise as thinly as possible
4 cloves garlic, thinly sliced lengthwise
1/2 c. bread crumbs
1 tsp. salt and a few grindings of pepper, plus more for roasting
1 tsp. Spanish smoked pimenton (optional)

For the vegetables:
2 yams
1 large turnip
1/2 tsp. dried thyme
Olive oil
Salt and pepper

Preheat oven to 400°.

Remove any twine or wrapping from the leg roast. Unroll on a cutting board with the fattier exterior on the bottom and the inside (where the bone used to be) facing up. If it's not quite flat, slice into the thicker parts so they open up like a book. (It's not important for it to be perfectly even or totally flat.) Lay the slices of prosciutto on top so they cover the surface, then lay the lemon slices in a single layer on top of that. Scatter the garlic slices over the top and sprinkle with salt and pepper.

Starting at one end, roll tightly and tie with kitchen twine to secure (see photo, above). In my case, this usually requires Dave's help, since holding the roast and tying tend to be more than I can do without ending up with stuffing flying all over the kitchen. Your experience may vary. Sprinkle the roast with the pimenton, rubbing it into the outside and salt and pepper generously.

Peel yams and turnip and cut into 1/2" or so dice. Place in mixing bowl, add thyme, salt and pepper and drizzle with olive oil. Stir to coat thoroughly.

Place tied roast in a large roasting pan and surround it with the roasted vegetables. Place roasting pan in center of oven and roast until the internal temperature reaches 125-130° (approx. 45 min.-1 hour), then remove to cutting board, tent with aluminum foil and let it rest for 20 minutes. (Other recipes call for an internal temperature of 155°, but we find that the meat tends to be overcooked and dry at that temperature.)

Look for other recipes in the Budget Cuts series: Stuffed Pork Leg Roast with Kale and Pine Nuts;  Chile-Marinated Pork Shoulder; Grilled London Broil; Pork Tagine with Pistachios, Almonds, Pine Nuts and Golden Raisins.

Thursday, January 20, 2011

Feed a Craving, Help a Family


Pie is one of my very favorite things, and few people make them better than Julie Richardson (below left) of Portland's Baker & Spice. And this weekend that center of sweetness in Hillsdale is not only celebrating its sixth birthday, but it's throwing a bash for National Pie Day (Jan. 23) by hosting a benefit for Neighborhood House with two days of pie-related fun.

With 25% of all pie sales going to the Emergency Food Box program at Neighborhood House, which feeds up to 700 Portland families a month, look for an apple pie contest at their retail store SweetWares, drawings for prizes that include a pie-a-month for a year or a seat in one of Julie’s pie classes.

And there's the unique opportunity to purchase pie by the slice from an array of their scrumptious pies. Get this list of delights: "Featured pies for the event include Lemon Meringue, Boston Cream, Banana Cream, Butterscotch Cream, Double Crusted Apple, Double Crusted Pear Raspberry, Chocolate Cream and Coconut Cream." So whatever your mouth is craving, they'll have a pie to fill it!

Details: National Pie Day and Sixth Birthday Benefit for the Emergency Food Box program at Neighborhood House. Sat.-Sun., Jan. 22-23, 7 am-3 pm. Baker & Spice, 6330 SW Capitol Hwy. 503-244-7573.

Photos by John Valls.

Wednesday, January 19, 2011

Kitten Update: Otter-rific


Just because she's so freakin' cute and I know you secretly love cute kitty photos, right? Right?

Otter at 10 months.

Crustacean Celebration: Let Them Eat Cakes


Yet another benefit of writing this blog, as if I didn't already have loads of reasons to keep spouting off, is that it gives me an excuse to ask my friends for their favorite recipes. Then, instead of writing it down on a piece of paper that's going to get tucked into (and lost under) one of the dozens of piles of papers, magazines and books that are scattered all over the house, I get to write it up (with accompanying photos) in this handy searchable database.

That was exactly the case when I was talking about crab with my friend Michel, a wicked cook and the creator of my favorite braised lamb dish ever. I knew she also had a mouth-wateringly delicious-sounding recipe for crab cakes, but we hadn't had a chance to get together to make them. So the blog became the perfect excuse to gather ingredients and have a crustacean celebration of our own.

Michel's Thai-ish Crab Cakes with Apple Cabbage Slaw

Yield: 15-18 small crab cakes

Combine:
Meat of two Dungeness crabs
1/2 red bell pepper, minced
1/4 c. minced red or green onion
1 serrano pepper, finely minced
2-4 Tbsp. cilantro, minced
1/4 c. bread crumbs
1/4 c. grated parmesan
Zest of 1 lime
(Adding some grated coconut and fresh mint or basil is also yummy.)
    Whisk together and add:
    Juice of 1 lime
    1 egg
      Stir crab mixture thoroughly.

      Crumb coating:
      1 c. bread crumbs, preferably Panko style
      1/4 c. grated parmesan

      Combine crumbs and parmesan and spread out on a plate.

      Assembly:
      Line a baking sheet with parchment or waxed paper.
      Scoop up about 1/4 cup of crab mixture and form into a plump cake about 2-inches in diameter (approx. 1” high). Compress so cake holds together.
      Gently sit cake in crumb mixture to coat bottom and sprinkle crumbs over top to coat (don’t flip the cake or it will fall apart).
      Gently compress cake between your hands to meld crumbs to the crab cake. (Keep cake plump; don’t flatten.)
      Set each formed cake on lined baking sheet.
      When all cakes are formed, place sheet in the refrigerator for at least 15 minutes.
      Heat large sauté pan or griddle to medium-high heat and add olive oil, butter or mixture of both to generously coat pan.
      Gently place cakes in pan or on griddle, leaving plenty of room to turn them.
      Cook until golden brown and turn gently to brown other side, adding more oil or butter if needed.
      If cooking cakes in stages, keep cakes warm in oven until ready to serve.

      I like to serve these with lime slices atop a delicate slaw made of Savoy cabbage, tart green apple tossed with lime (julienned, not grated), thinly sliced red onion, grated carrot and cilantro, dressed with a simple mixture of lime juice, Thai fish sauce and sugar…add a bit of olive oil if you wish. Make slaw about 15 minutes before serving.

      Check out this season's Crustacean Celebration series: Pasta with Crab and Radicchio, Deadly? I Think Not, and The Big Boys Weigh In. See also: last season's series starting with Hot Artichoke and Crab Dip (and links to other posts in the series).

      Top photo by Jon Roberts.

      Monday, January 17, 2011

      An Offer I Couldn't Refuse, Pt. 2: Having a Gas


      Time for some history:

      More than once we heard Vancouver, BC, referred to as the "City of Glass" after the legions of windowed towers that dominate the city proper. The original settlement, however, was much more humble. Called Gastown, it was named after gold prospector, riverboat captain and saloon keeper John "Gassy Jack" Deighton (statue, above). It was reincorporated as the City of Vancouver in 1886, though less than two months later the entire city was burned to the ground by an out-of-control brush-clearing fire. Whoops.

      The two surviving buildings formed the core of the city's rebuilding efforts, and the neighborhood known as Gastown grew and prospered into the 20th century until developers' attention wandered to other, more lucrative ventures. Like many historic districts, it fell into disrepair, neglected by all but the city's least fortunate citizens. But, as happened in many urban centers in the 1960s and 70s, just as the mania for so-called "urban renewal" was about to level it, a dedicated group of citizens organized a campaign to save the area and Gastown was declared a historic district in 1971.

      Like Portland's Old Town, at first it was a huge tourist draw, though it struggled with drug and gang activity for decades. Then, about five years ago, new entrepreneurs were drawn to the area by attractive rents and a reflowering began.


      Our tour began with a preview of Big Lou's Butcher Shop, a venture by neighborhood restaurateurs Karl Gregg and Allan Bosomworth (left) (see Two Chefs and a Table, below) that was scheduled to open in  the next couple of days. Advertised as a nose-to-tail butcher shop, the partners are sourcing their meat from area farms like Polderside Farms, Sloping Hill Farm, Pemberton Meadows Beef and Heritage Valley Farm. Though they aren't curing or dry-aging their own meats yet, they do share a cold storage facility with other suppliers and plans are in the works for an expanded list of house-made products. What they do have is a meat-case full of very large hunks of animal flesh and sausages made in-house, and a menu of specialty sandwiches. Details: Big Lou's Butcher Shop, 269 Powell St., Vancouver, BC. 604-566-9229.


      A couple of blocks away Karl and Allan had done a quick change into their chef coats and were talking us through the menu at Two Chefs and a Table, a bistro as well as a catering and event planning company. Like many of the restaurants we visited, it's dedicated to showcasing local, sustainable products as much as possible in this northerly climate. Or, as Karl said, "Someone calls and says they've got 300 pounds of tuna and we'll change the menu." The open kitchen isn't surprising, but the reason they have one is, according to Gregg. "It's so you can smell the food before it comes to you," he said. As to why they recently added a full brunch on the weekend, he said, "It's because I like a good brunch." Any wonder that I'm putting this tiny place at the top of my list of must-visit restaurants on our next trip north? Details: Two Chefs and a Table, 305 Alexander St., Vancouver, BC. 778-233-1303.


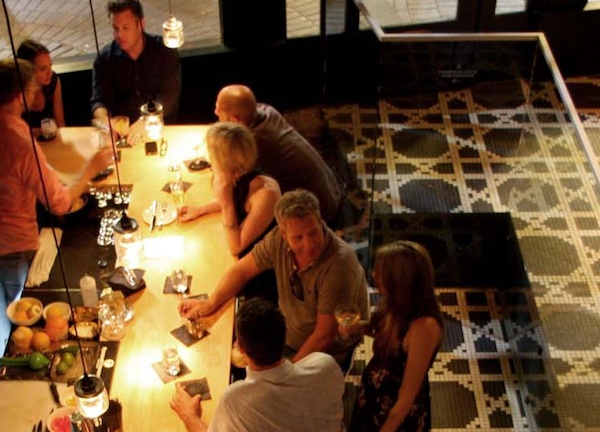
      The next three Gastown spots we visited were owned by Gastown mover-and-shaker Mark Brand, who looks like he just stepped out of a Scorsese gangster movie. Sea Monstr Sushi occupies a long, narrow brick-walled space where the disembodied heads of the sushi chefs hover behind the service bar-cum-seating area. Your orders are placed along the top of the counter as they're plated, the lighting specifically designed to spotlight the food at each place. Details: Sea Monstr Sushi, 55 Powell St., Vancouver, BC. 604-681-2144.


      The Diamond has that slightly dangerous, speakeasy vibe, only enhanced by its narrow, gated entrance at street level. From there it's a climb up a darkened staircase to a windowed room that feels like it's straight out of a turn-of-the-century brothel. Which, according to Brand (photo above), at one time it was. In the second-oldest building in Vancouver, the story goes that it survived the 1886 fire only because it was the favorite bordello of the city's firefighters, once again proving that it's not what you know, it's who has a big firehose (so to speak). Also a bartending school, it offers classes from beginner to expert, which accounts for the plethora of stoppered bottles of house-made bitters and infusions behind the bar. Though the drinks are the focus, the food is also rumored to be good, consisting of small plates meant to be shared. The one disappointment? We didn't get to go into the secret room behind the bar where guest bartenders test their latest creations. Details: The Diamond, 6 Powell St. 604-408-2891.


      A favorite of reviewers and the public alike, Boneta is the third jewel in Brand's crown, one he shares with partners Neil Ingram and Jeremie Bastien. It's named after Brand's mother, though he lays the creative spelling of her name at his grandmother's feet. Consistently excellent quality is a hallmark of this casual French dining spot, its hottest selling items being the bison carpaccio and the very (French) Canadian poutine of crispy fries, Okanagan cheese curds and a salty brown gravy. The rest of the menu changes regularly to reflect seasonal availability, with one reviewer calling 29-year-old chef Bastien's menues "youthful, exuberant, unbuttoned." This is not expected to change when the restaurant moves to its new location a few blocks away in the historic Garage building in mid-February. Details: Boneta, (new location) 12 Water St., Vancouver, BC. 604-684-1844.


      Not that I'm a big fan of restaurant taglines, but the three words attached to Gastown newcomer Cork & Fin are "Eat. Drink. Local." Owners Elliott Hashimoto and Francis Regio shop local waters and pastures for the fresh seafood and meat featured in their restaurant, preferring to have relationships with small family purveyors over larger distributors.  Their $30 three-course prix fixe menu is said to be one of the best deals in the city. Not only that, but they actually encourage customers to share it with a dining companion. And in warmer weather, the whole front of the restaurant opens up to spill onto the sidewalks, sharing some of that seafaring ambience with the rest of the city. Details: Cork & Fin, 221 Carral St., Vancouver, BC. 604-569-2215.


      As if a tour of six restaurants in one afternoon wasn't enough, we were scheduled to attend a preview of the Vancouver Tales of the Cocktail event at the hotel before dinner at L'Abattoir back in Gastown. After sampling an authentic (and perfect) Sazerac made by Jay Jones of Pourhouse*, served in an antique glass from his personal collection, we hopped (or was it stumbled?) into taxis and were whisked over to L'Abattoir where bartender Shaun Layton "crossed the wood" with a cocktail, the Loire Sidecar, that he recreated from the menu at the Hemingway Bar in Paris. (He's also known for collecting antique crystal glassware and bar tools, so if you want to make friends fast, start complimenting him on his selection.) Chef Lee Cooper's menu tends toward traditional preparations with totally fresh ingredients, with all sauces, pastas, breads and even fresh cheeses made in-house. His baked sablefish with mushrooms was fabulous and prompted a spirited discussion of naming fish for marketing purposes (sablefish is also called butterfish or black cod, though it's no relation to the true cod). The brick-walled dining room is on two levels, with the bar one the first level and a glass atrium that would be an ideal hideaway for murmured, romantic conversations. Details: L'Abattoir, 217 Carrall St., Vancouver, BC. 604-568-1701.

      For more from my culinary tour of this gorgeous city, see Part 1: An Offer I Couldn't Refuse and Part 3: A Grand Tour.

      *Jay Jones has since accepted a position at the bar at Market by Jean-Georges at the Shangri-La Hotel.

      Saturday, January 15, 2011

      Pancakes 101


      Good cooks become good cooks over time, developing recipes through trial and error, experimenting with ingredients and methods until they finally find the mix that works for them. Contributor Jim Dixon of Real Good Food has done just that with pancakes, and this week he shares two of his favorite recipes with us.

      My pancake touchstone is the recipe in my 1943 Joy of Cooking. A couple of eggs, milk, salt and flour, the batter leavened with double acting baking powder. When our boys were young I made it with buttermilk, Nancy’s yogurt and a blend of white and whole wheat flour. We ate them with jam and yogurt mostly, sometimes fake maple syrup. My approach has evolved a bit over the past couple of decades.

      Pancakes

      For basic pancakes you need three mixing bowls. In one combine about a cup and half of whole wheat flour (or mixture of unbleached white, white whole wheat, etc.) with a teaspoon each of baking powder and salt. Blend well.

      Use the other two bowls to separate two eggs. In the bowl with the yolks, blend in about a cup of buttermilk (or milk and yogurt mixed, or just milk). Set the whites aside for a minute.

      Make a depression in the flour mix in the dry bowl, pour in the milk blend, and mix gently until combined. It should be fairly thick, but not that it won’t pour, so add a little more milk if necessary, but don’t mix any more than you need to.

      Use a manual eggbeater to beat the whites to soft peaks, then gently fold them in to the batter.

      Your griddle or skillet should be heated already (low heat, preferably cast iron). Drop spoonfuls of batter onto the griddle; keep them small and the cakes will be easier to manage. Don’t crowd them, either.

      Ignore them for about 3-4 minutes, then look to see if the edges are drying out and small bubbles are forming on the top. When the bubbles on top begin to open, gently slide a thin metal spatula under the edge of the first cake. Lift it a bit to make sure it’s brown, then loosen the edges before flipping it over. Flip the rest, cook for another 3-4 minutes, then remove to a warm plate for eating.

      After I started getting the incredible corn meal produced by Carol and Anthony Boutard at their Ayers Creek Farm, I made corn cakes by substituting the corn for some of the flour. These are also delicious, especially with the addition of some chopped cooked bacon, or, even better, candied bacon.

      But after making some fritters from cooked winter squash and polenta, and liking how the squash blended with the corn, I thought the same combination might work with pancakes. It does.

      Winter Squash Corncakes with Bacon

      In one bowl, combine the dry ingredients: 1 cup good cornmeal (Ayers Creek, Anson Mills or similar whole grain ground corn), 1/2 cup whole wheat flour, 1 teaspoon each baking soda and salt. Add about a half cup of chopped, cooked bacon.

      Separate two eggs. To the yolks, add a cup of cooked winter squash, and a cup of milk (or buttermilk or yogurt or a mix). Blend well, then combine with the dry ingredients. Add more milk if the batter is too thick to pour. Beat the whites to soft peaks and fold in.

      Cook as described above. I like to eat these with maple syrup and creme fraiche.

      Top photo: For a great topper, check out this recipe for Braised Apples, Maple Syrup and Bourbon.

      Friday, January 14, 2011

      An Offer I Couldn't Refuse, Pt. 1


      The chime of the incoming e-mail message sounded normal enough. But when I clicked to read it I nearly fell out of my chair. Someone from Tourism Vancouver was asking if I'd be interested in coming to that city for a three-day culinary tour of the latest hot spots, along with a cocktail showcase previewing the upcoming Tales of the Cocktail festival and a sampling of restaurants participating in Dine Out Vancouver.

      Assuming they must surely have me confused with some other writer, I nonetheless hit the reply button as quickly as I could, hoping it would get there before they realized their error. Then, being the nice people that Canadians are reputed to be, they'd be too polite to rescind the invite. Right?

      The itinerary arrived a few days later and I found out they'd not only be flying me up, but I'd be housed at one of the newest hotels in town, the Fairmont Pacific Rim, smack dab on the harbor overlooking Stanley Park and directly opposite the Coast mountain range that rings the city (top photo). They'd invited a dozen writers to come on the tour, including my neighbor, author Ivy Manning, a veteran of many tours who could dispense sage advice to a noob like myself.

      First up after pitching my bag in the hotel room was a sushi making class and sake pairing with Chef Jason Harris (left) of the Fairmont's Oru restaurant. A very personable guy (nice people, the Canadians, remember?), he'd decided to have us make albacore nigiri, the fish and a smear of wasabi perched on a compressed scoop of rice, as well as a tamaki cone filled with either a salmon or spicy albacore mixture along with our choice of vegetables.

      The key with nigiri, as any of you experienced sushi makers know, is to keep your hands moist so the rice sticks to itself rather than turning your hands into rice-covered mittens. Chef Harris prefers a special sushi rice called koshikari, since it keeps its shape while still sticking together. Then it's just forming the rice into a tight little log, swiping the slice of fish with a smear of wasabi and placing it on top of the rice. A little pressure on the sides of the fish to conform it to the rice and seal the deal and you're done. Wow!

      The tamaki was fascinating, since there's a real trick to forming the cone. Moistening your hands, take a small amount of rice and, with your fingertips, form it into a triangle at the top of a sheet of nori (about 4" by 8"). Then place matchsticks of vegetables or other fillings at an angle across the rice (right). Take the upper left-hand corner of the nori and gently fold it down to the right, making a 45° angle. Continue rolling until it forms a cone (below left). Simple!

      Chef Harris emphasized that it's important to eat the cone as soon as possible after making it, since the moisture in the rice will quickly soak into the nori and it won't have the crisp freshness that lends so much to the texture of the cone.

      There was a little time left in the class before we sat down to lunch, so Chef Harris showed us how to make a simple sushi roll. With moistened fingertips, cover three quarters of the nori sheet (approx. 4" by 8") with a thin layer of rice, arranging the fillings at one end. Then, gently but firmly, roll it toward the open end.

      Again there's a trick, and that's to wrap the bamboo sushi mat with plastic wrap so the roll won't stick to it. Then cover the roll with the mat and gently press it with your hands to seal the roll. All that's left is to slice the roll crosswise into rounds and eat.

      Of the two sakes we paired with these, one was made by artisan sake producer Masa Shiroki of Osake on Granville Island. All of the sakes he makes are junmai sakes, that is, they're made from rice, water, yeast, and the micro-organism called koji. It's unfiltered, with a very light and slightly sweet taste and a body similar to sauvignon blanc. The other was, to my surprise, from Oregon-made Momokawa sake, with a slightly drier taste and smooth body. Both were terrific, and made me want to explore this wine a little more.

      I'm thinking a small cocktail party with sushi fixings would be a fun twist on the usual snacks-and-drinks gathering, plus people would be astonished at not only how easy it was, but that I learned to do it on a trip to Canada. Who'd expect that?

      For more of my culinary tour of this gorgeous city, see Part 2: Having a Gas and Part 3: A Grand Tour.

      Friday, January 07, 2011

      Some Lazy Sunday


      Growing up in an Episcopalian family, Sunday mornings were for church, immediately followed by a quick change into more comfortable clothes. But in this largely un-churched age (especially here in Oregon) people use it as an opportunity to get projects done around the house. Painting the basement? They'll run to the paint store for supplies in the morning and finish up by nightfall. Digging up the parking strip and planting 100 feet of garden next to the house? We'll hear the rototiller chug to life at 8 am and the summer's crop will be in the ground by late afternoon. Staked and fertilized, too.

      All this busyness makes us look like the layabouts that, to be completely honest, we truly are. Sunday mornings around here are spent in bathrobes that are rarely doffed before noon. Not that there's any lack of activity, mind you. There's coffee to be made, dogs to be fed, newspapers to be fetched from the front porch and read, plus NPR to be listened to (and commented on).

      And even though the days of the big breakfast should be long gone, there's nothing Dave likes better than to fire up the oven and bake his signature sourdough biscuits, or make English muffins that go ever-so-perfectly with a cheese omelet.

      Lately he's been experimenting with some new scone recipes, and found one that's become his current favorite. Any leftovers freeze well and are terrific for a hurried mid-week breakfast. But if you drop by our house some Sunday morning expect to be met by a couple of sleepy-eyed, slipper-clad lazybones with papers in hand. Though if you pour a cup of coffee and sit down with one of these scones, you might just find a new groove for your Sunday morning.

      Lazy Sunday Scones
      Adapted from Bakingby James Peterson

      3 c. flour
      5 Tbsp. sugar
      1 Tbsp. plus 1 tsp. baking powder
      1/2 tsp. salt
      1 c. cold butter or margarine
      1 1/4 c. milk

      Preheat oven to 375°.

      Mix dry ingredients in processor. Add thin slices of margarine and pulse until mixed. Add milk and process until mixed. Turn out onto floured surface. Gather and knead about 10 times (not too much or scones will be tough). Roll until about 1/2 inches thick. From one side, fold one-third of the dough up, then do the same from the opposite side. Turn a quarter turn and fold the ends up similarly. Place on plate and put in freezer for five minutes.

      Remove from freezer. Roll out again into rough rectangle to about 1/2 inch thick. This time roll up starting on short edge. Roll out rolled dough into rectangle with long sides and short ends, to about 1/2 to 3/4 inches thick. Cut dough into rectangles, then wedges to desired size. Place on baking sheet. Lower oven temperature to 350°. Bake until golden brown, about 25-30 minutes.

      Wednesday, January 05, 2011

      Sunshine on a Cloudy Day


      Over the holidays a friend sent this view from her vacation perch in Honolulu (click to get the full-size photo). Now I have it as my desktop so I can dream about tropical breezes, tall, cool drinks and the faraway sound of the surf. Ahhhhhhhhh…

      Tuesday, January 04, 2011

      14 Things I Love


      If only there was an app for that: I'm talking about 100 Things We Love, the compilation of the year's best food, drink, books and places to fuel your next obsession, put together by the writers and contributors to the Oregonian's FoodDay section.

      This year it covers everything from farmers' markets to pantry must-haves to bookshelf staples, and the editor was kind enough to include a few of mine:
      It's always a great read, and I guarantee you'll discover things that you never knew existed. Now to get my in-house programmer working on that app…

      Monday, January 03, 2011

      Brought to You by the Letter P: Purple Pleasures


      Aubergine, melongene or eggplant: no matter what you call them, these purple members of the nightshade family, related to potatoes and tomatoes, have a dense, meaty texture. They're found in many of the world's great cuisines, and contributor Jim Dixon of Real Good Food loves the way they can be combined with different flavors to make a great meal.

      Most eggplant recipes include directions for salting to “draw out bitterness.” This step has always mystified me, and perhaps it’s a relic of some long ago time when eggplant were actually bitter. But I’ve eaten literally hundreds of eggplant and never tasted anything bitter. So skip the salting. This is my current favorite:

      Garlicky, Spicy, Smoky Eggplant

      Slice a large eggplant into disks, stack 2 or 3 at a time, and cut them into strips, then cubes, roughly half an inch square. Heat a heavy skillet, preferably cast iron, and add enough extra virgin olive oil to cover the bottom with a thin layer. When the oil ripples a bit, add the cubed eggplant, but only so much to cover the pan in a single layer. Leave it alone for several minutes, then use a stiff spatula to lift and turn the cubes. Keep this up until the eggplant is nicely browned and softened, about 15 minutes cooking time total. If you couldn’t cook all the cubes at once, remove the cooked ones and repeat with the rest.

      When it’s cooked through and nicely browned, reduce the heat a bit and add 3-6 (or more) roughly chopped garlic cloves. Optional, but highly recommended, are 1-2 finely diced anchovey fillets, preferably the salt packed variety (rinse these under cold running water and filet with your fingers, much easier than it sounds).

      Cook for a few minutes to soften the garlic, then add a nice sprinkle of some kind of hot chile: piment d’espellette if you can find it, cayenne, or red chile flake. Shake on a more generous amount of the Spanish smoked paprika called pimenton (I like the “dulce” version, but you could use the hot variety to cover both the smoky and spicy bases here). Cook for another minute; salt to taste and drizzle with good extra virgin olive oil at the table.

      Sunday, January 02, 2011

      Echoes From the Canyon


      My friend Clare Carver was a Bay Area artist and graphic designer when she and her husband,  winemaker Brian Marcy, decided that they wanted to own a farm and grow their own grapes. I wrote about her experience in an article for NW Palate magazine titled "Setting a Big Table," and Clare has continued recording her journey from city gal to seasoned farmer on her Big Table Farm blog.

      She recently celebrated the fourth anniversary of that blog by reposting one of her first entries about being a newcomer to country life, then adding a 2011 addendum to each one. You can read the entire post here, but I'm excerpting a few of her pithy observations below:

      On transportation

      • 2007: You get really excited when you see the bulldozer on the road. It means you're getting new gravel and less potholes. 2011: I've learned to buy the cheapest tires possible, as you go through about one set per year on gravel.
      • 2007: You never thought you’d be driving your hybrid car with shotgun shells rattling around behind your seat. 2011: and that your car would permanently smell like a barn.
      • 2007: When you make a trip “to town” you make it count! 2011: and it's a good idea to get off the farm at least once a week and see beings on two feet.
      • 2007: Your husband puts his rusty old jeep in the front yard and you really don’t care. 2011: The jeep has been joined by a second rusty vehicle and you now think it's charming. Hell, you liked it so much you did a painting of it (above left).

      On Heat

      • 2007: The wood stove is king. 2011: and insulation is the prince. No, wait, my husband is the prince for putting it in!
      • 2007: You learn the maul is NOT where you go for shoes, it’s what you use at 7am on a Sunday morning when the fire burned down too far for a big log and you need some kindling…shin guards are recommended. 2011: you get all your wood split and stacked and in the wood shed in the SUMMER!

      On Power and other modern conveniences

      • 2007: You learn when you lose power it’s not heat that’s the problem, it’s water. (Most wells require power. Who knew?) 2011: Brown water coming out of your tap before you are about to have 10 people over for dinner makes things fun.
      • 2007: The mail lady knows your dog's name and nags you about the “accessibility” of your mail box due to the road being washed out. 2011: And she literally hikes through snow to bring Christmas presents. And the UPS guy, well, just saw him at the bar in town (the one horse tavern) when we stopped in for a beer.
      • 2007: The wood stove is also a very valuable cook surface. 2011: and I will say I've mastered the stock pot.
      • 2007: Hot water bottles are one of man’s greatest inventions. 2011: Hmmm…I may go get some water going for one right now.

      Other things I’ve noted


      • 2007: It’s quiet…I mean really quiet! 2011: not as quiet now as I've acquired lots of animals that like to remind me of their presence every time I walk outside.
      • 2007: I can see sky from every window. 2011: and who's gonna clean these stinkin' windows anyway?
      • 2007: Our friends still visit, which is amazing! 2011: Still true. Thanks to all for the company, love and friendship!

      And thank you, Clare, for sharing your life with all of us!

      All photos by Clare Carver.