

This past Mother's Day brought forth a flood of memories of the women in my family, many of whom have passed on but who left indelible impressions. Some are as sharp as the high heels my mother loved to wear, others as soft as the pastel-colored housedresses my father's mother wore. Many, for me—as I'm sure will come as a surprise to no one—involved food: my maternal grandmother's rhubarb sauce that my grandfather heaped sugar on; the batches of cabbage rolls that my dad's family called "hoblich," an invariable feature at any gathering; my own mother's love of fruit desserts and pies.

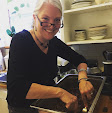
My mother in party mode.
The one dessert that she adored but never felt that she mastered, at least according to her exacting standards—my Kentucky-raised friend Kathryn would interject "bless her heart" here—was lemon meringue pie. I recall many of these cloud-topped confections parading through my young life, but for my mom there was always a meringue that pulled away from the crust, even if only a little, or it bore too many overly browned curlicues on its tips, or the curd was too sweet or too tart.
No matter how many compliments were showered on her efforts, she'd turn them away by pointing out its shortcomings or by saying, "Oh, you should try my friend Eleanor's, she makes the best lemon meringue." In other words, it was a fraught topic for her.

A simple lemon tart to love.
I, on the other hand, was more than happy to gobble up any and all "mistakes," major or minor. If the smooth lemony curd made the back of my tongue tingle, all the better. If its sweetness cut the lemon's tang, I can't remember minding. Ditto with any meringue issues.
These recollections came rushing back recently when Dave was experimenting with a lemon tart recipe from Cook's Illustrated, following on the heels of his apple galette epiphany. The curd is smooth and has just the right tang of lemon, the crust is short and not-too-sweet, and a dollop of whipped cream obviates any potential meringue traumas.
I think my mother would approve.
Lemon Olive Oil Tart
Adapted from Cook's Illustrated
For the crust:
1 1/2 cups (7 1/2 oz.) flour
5 Tbsp. (2 1/4 oz.) sugar
1/2 tsp. kosher salt
1/2 c. olive oil
2 Tbsp. water
For the filling:
1 c. (7 oz.) sugar
2 Tbsp. flour
1/4 tsp. kosher salt
3 eggs plus 3 yolks
1 Tbsp. grated lemon zest plus 1/2 cup juice (approx. 3 lemons)
1/4 c. olive oil
Make sure that all your metal equipment—saucepan, strainer and whisk—is nonreactive, or the filling may have a metallic flavor.
For the crust: Adjust oven rack to middle position and heat oven to 350°. Whisk flour, sugar and salt together in bowl. Add oil and water and stir until uniform dough forms. Using your hands, crumble three-quarters of dough over bottom of 9-inch tart pan with removable bottom. Press dough to even thickness in bottom of pan. Crumble remaining dough and scatter evenly around edge of pan, then press crumbled dough into fluted sides of pan. Press dough to even thickness. Place pan on rimmed baking sheet and bake until crust is deep golden brown and firm to touch, 30 to 35 minutes, rotating pan halfway through baking.
For the filling: About 5 minutes before crust is finished baking, whisk sugar, flour and salt in medium saucepan until combined. Whisk in eggs and yolks until no streaks of egg remain. Whisk in lemon zest and juice. Cook over medium-low heat, whisking constantly and scraping corners of saucepan, until mixture thickens slightly and registers 160°, 5 to 8 minutes.
Off the heat, whisk in oil until incorporated. Strain curd through fine-mesh strainer set over bowl. Pour curd into warm tart shell.
Bake until filling is set and barely jiggles when pan is shaken, 8 to 12 minutes. Let tart cool completely on wire rack, at least 2 hours. Remove outer metal ring of tart pan. Slide thin metal spatula between tart and pan bottom, then carefully slide tart onto serving platter. Cut tart into wedges, wiping knife clean between cuts if necessary, and serve. (Leftovers can be wrapped loosely in plastic wrap and refrigerated for up to 3 days.)


 Posts
Posts

